Recording Studio

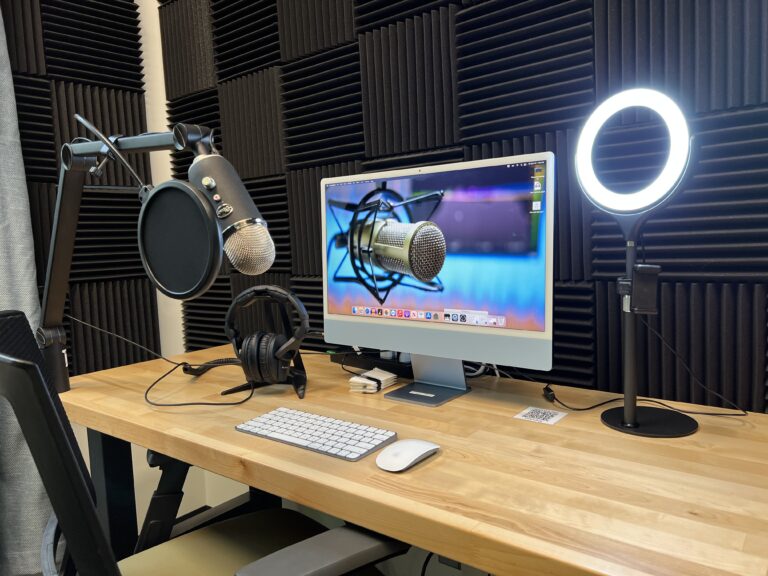
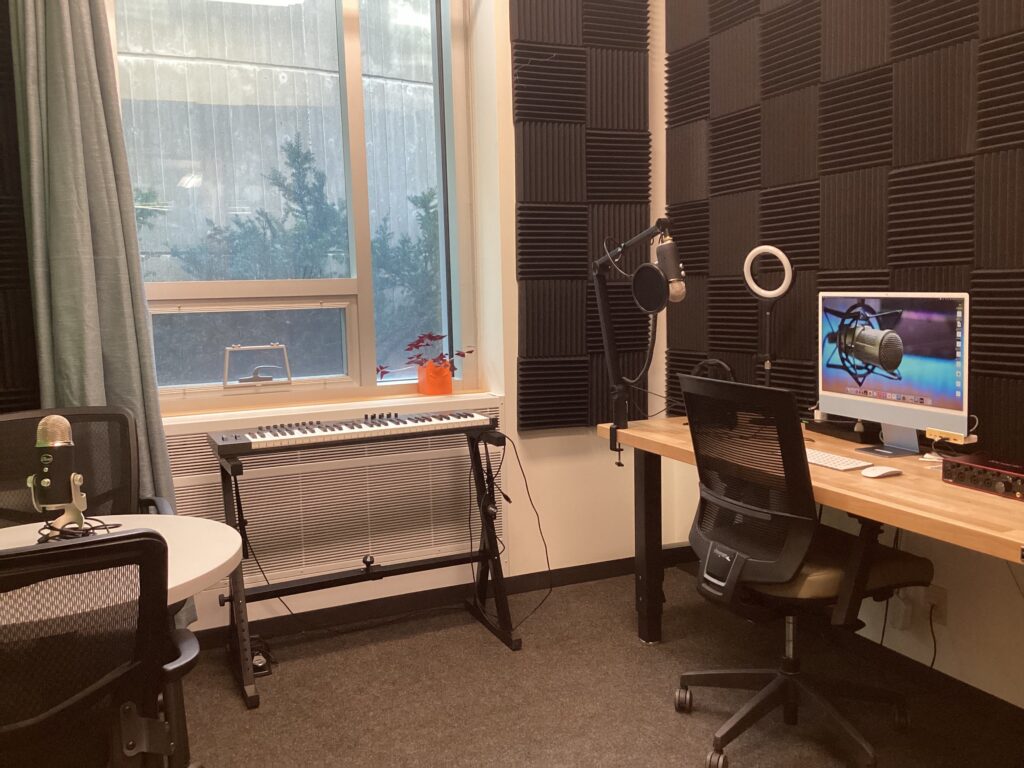
The Makerspace Recording Studio features noise-dampening panels, a green screen, playback headphones, microphones, an iMac, a Nektar Impact keyboard controller, an audio interface, and an interview table.

Recording software available is Ableton Live 11, Audacity, Garage Band, and OBS. AutoTune Access 10 plugin available.

It is a reservable space but is open to drop-in use if not reserved.
Setting up the room and Getting Started

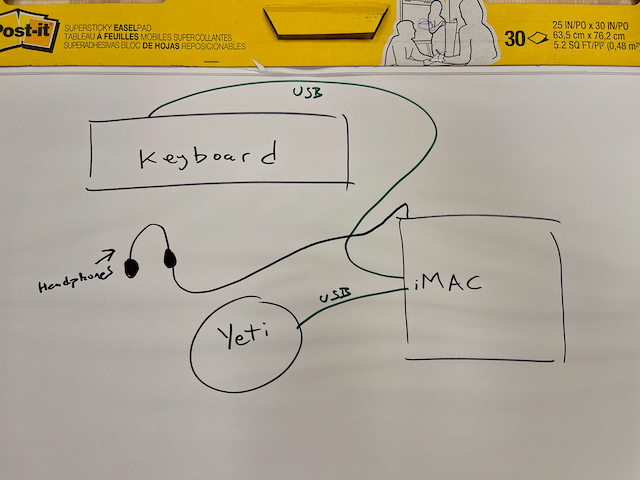
The easiest way to get started is to use the Yeti Blue USB microphone, which connects directly to the iMac for a simple, high-quality recording setup. This approach is ideal for solo recordings or interviews with 1 or more people. Just follow these steps to plug in, adjust a few settings, and you’ll be ready to start recording in GarageBand in no time!

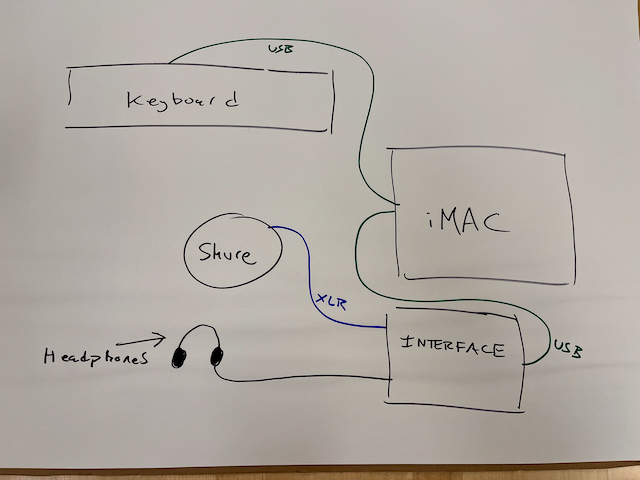
More advanced users may want to use the Shure microphone (which looks like something you would see at a concert) connected through the interface. This can be a little more tricky to set up, and so is recommended for people who have experience or have the time to learn.

Connect the Yeti Blue Microphone and Headphones

  • Plug the Yeti microphone’s USB cable into a USB port on the front of the iMac.
  • Confirm the microphone’s blue LED is on, indicating it’s powered.
  • Connect headphones to the headphone jack on the left side of the iMAC monitor (the headphones that come in the Recording Studio might have a large gold adaptor connected that you may have to remove before you can insert them)

Adjust Yeti Dials:

  • Gain Dial (located on the back): Start with the gain dial set to the middle position. If your audio sounds too quiet or too loud, adjust accordingly until your voice is clear without peaking.
  • Pattern Dial (also on the back):
    • For solo recording (just you speaking), select the cardioid pattern (heart icon).
    • For interviews (you and another person sitting opposite each other), select the bi-directional pattern (two circles icon).
    • For multi-person interviews and performances choose the omni setting (circle icon) which records all around the microphone.
  • Volume Dial (front of the mic): This controls the volume of your headphone monitoring only, not the recording volume

GarageBand Setup

Open GarageBand and create a New Project (choose Empty Project)

  • Choose the “Nic or Line” audio option when asked to Create New Track:
  • Under “Input” make sure that “Input 1 (Yeti Stereo Microphone)” in the track settings (click on the track and check the left sidebar).

Set Levels in GarageBand:

  • Speak into the microphone and watch the input meter (the green bar on the track).
  • Adjust the gain dial on the back of the Yeti if needed to ensure your voice reaches about 75% of the meter without turning red.
  • If there is no activity on the input meter see troubleshooting guide below

Recording

  • Click the Red Record Button to start recording.
  • When done, hit Stop and use the Play button to listen to your recording.

No Sound?

  • Confirm the USB cable is securely connected and the blue LED on the Yeti is on.
  • Confirm the Yeti is not muted (blinking red light)
  • Ensure “Yeti Stereo Microphone” is selected in System Preferences > Sound > Input.
  • In GarageBand, double-check the input is set to “Input 1-2 (BLUE USB Audio 2.0)” under track settings.
  • In Garage Band under File -> Settings -> Audio/Midi make sure “External headphones are selected” under Output Device

Audio Too Quiet or Too Loud?

  • Adjust the Gain Dial on the back of the Yeti.
  • Check the Input Volume in macOS System Preferences > Sound.

Hearing Echo in Headphones?

  • If your headphones are connected to the Yeti, turn down the Monitor Volume Dial on the front of the Yeti.
  • Ensure Monitoring in GarageBand is set to “Off” unless needed for immediate playback.

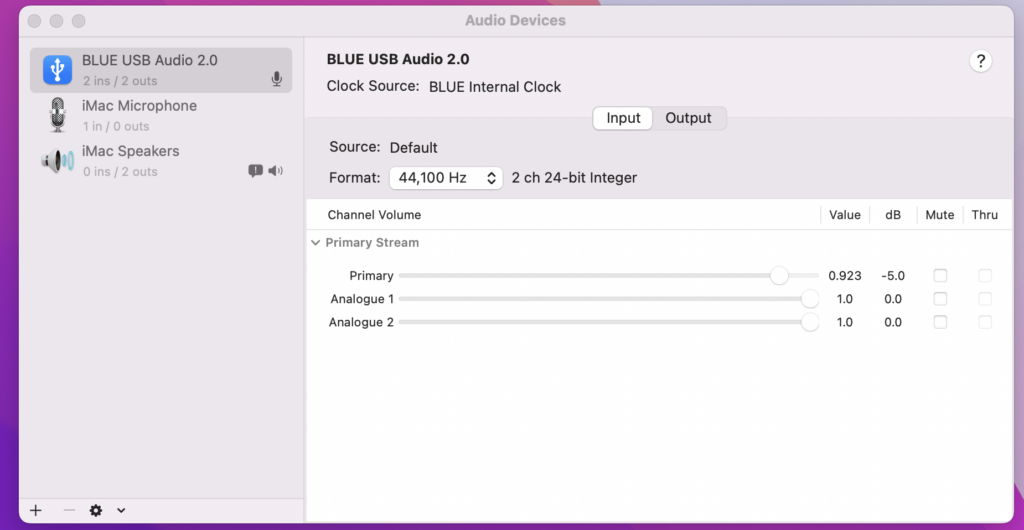
If you’ve tried turning up the input volume and there is still no sound…

  • Open Launchpad and use the search bar to type Audio
  • Open Audio MIDI Setup
  • Select Blue USB Audio 2.0
  • Ensure input and output range are similar to the following screenshots and adjust the settings

Advanced Guide: Recording with Shure XLR Microphone and Scarlett 18i8 Interface

1. Setting Up the Shure Microphone and Scarlett Interface

Connect the Microphone:

  • Plug the Shure microphone into Input 1 on the Scarlett 18i8 using an XLR cable.
  • Make sure the Sharlett is powered on and connected to the iMAC via the USB cable
  • Turn the Gain Knob for Input 1 on the Scarlett to about 50% as a starting point.

Headphone Monitoring:

  • Connect your headphones to the Headphone Output on the Scarlett interface. You may need to screw the gold adaptor onto the end of the headphone jack.
  • Adjust the Headphone Volume Dial on the Scarlett to about 60% to start

2. GarageBand Setup

Open GarageBand and create a New Project.

  • Choose the Audio Track:
  • Select Mic or Line Audio Track when prompted.
  • Under input it should say “Input 1” and “My instrument is connected with: Scarlett 18i8 USB” if not click the arrow next to this section and adjust preferences or go to GarageBand > Preferences > Audio/MIDI and confirm that Scarlett 18i8 is selected as the Input and Output Device.

Set Input in Track Settings:

  • Click on your audio track and, in the left sidebar under “Recording Settings,” set the input to Input 1 to match the Shure microphone’s channel on the Scarlett interface.
  • Speak into the microphone and check the input meter on the track. Adjust the Scarlett’s gain as needed so your audio peaks near 75% on the meter without turning red.
  • Make sure Monitoring is set to On if you want to hear yourself in real-time through your headphones (note: monitoring may add a slight delay or “latency”).

3. Recording and Playback

  • Start Recording: Press the Red Record Button in GarageBand.
  • Playback: When done, press Stop and hit Play to listen to your recording. Sound will play through the Scarlett interface into your connected headphones.

4. Troubleshooting Common Issues

No Sound from Microphone?

  • Confirm the XLR cable is securely connected to both the Shure microphone and Scarlett Input 1.
  • Verify Scarlett 18i8 is selected as the Input in System Preferences > Sound and in GarageBand Preferences > Audio/MIDI.
  • Ensure the gain on the Scarlett is turned up (around 50% to start) and that the Gain Light turns green when speaking.

Audio Too Quiet or Too Loud?

  • Adjust the Gain Knob on the Scarlett until the input level in GarageBand is optimal (approximately 75%).
  • Avoid setting the gain too high, as this may cause clipping (indicated by red lights on the Scarlett and GarageBand’s input meter).

Hearing Echo or Latency in Headphones?

  • Go to GarageBand > Preferences > Audio/MIDI and turn Monitoring Off if you don’t need it for real-time feedback.
  • Ensure the Direct Monitor switch on the Scarlett interface (if available) is set to “On” for zero-latency monitoring.

Playback Issues?

  • Double-check that Scarlett 18i8 is selected as the output device in both macOS System Preferences > Sound and GarageBand’s Audio/MIDI Preferences.
  • Make sure your headphones are securely connected to the Scarlett interface and that the headphone volume dial is turned up to a comfortable level.

If you’ve tried turning up the input volume and there is still no sound…

  • Open Launchpad and use the search bar to type Audio
  • Open Audio MIDI Setup
  • Select Blue USB Audio 2.0
  • Ensure input and output range are similar to the following two screenshots

How To Add Structure To Your Podcast And Hook Your Audience

This video talks about how starting a podcast is more than just hitting record. It talks about how to use a simple structure to grab the attention, engagement, and trust of an audience!

Modern Vintage Radio

Ableton Live Beginner Tutorial

A quick video teaching the basics of Ableton Live 11

Skills Factory

Media Technology to Borrow

Borrowing technology means you can take that technology out of the Makerspace, similar to how you would check out a book in the library. To learn more about Makerspace technologies you can borrow check out our Borrow Technology page!

Blue Yeti Microphone

This USB plugin mic is the same as we have in the recording studio. It features modes that allow you to choose which direction you want the mic to pick up sound from.

Insta360 One X2

Borrow the Insta 360 to get 360 degree shots of your adventures!

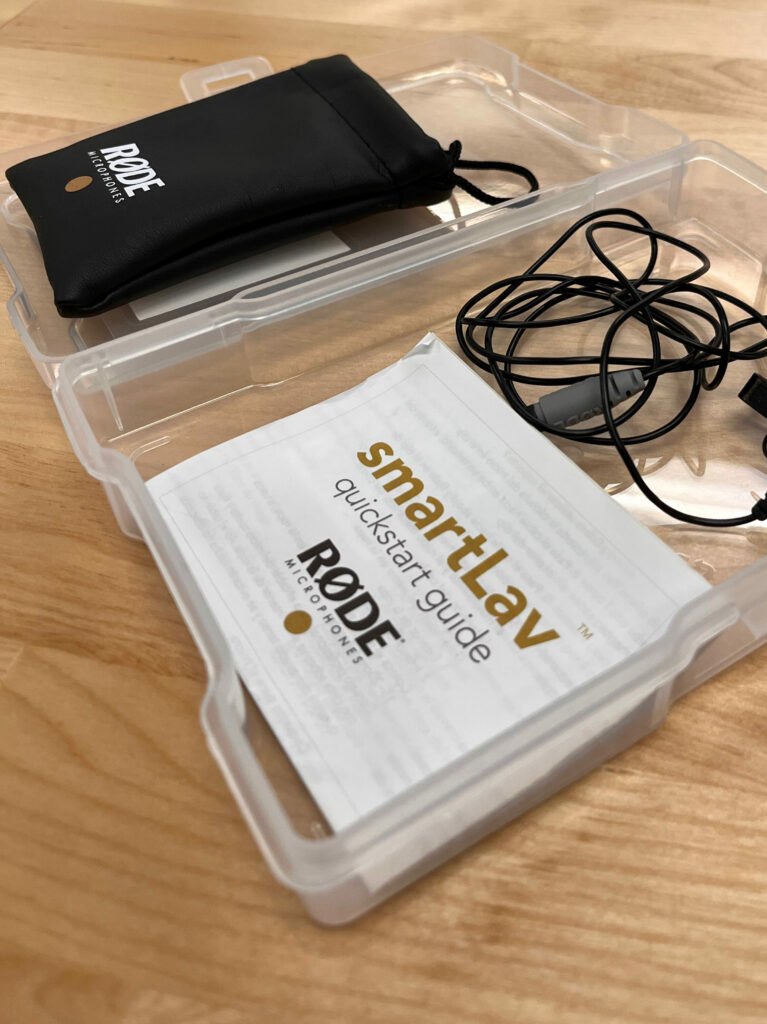
RØDE Smart Lav Mic

These small microphones clip onto a shirt or lapel and plug into your phone, tablet, or other devices to record.

RØDE Wireless Go II

These small recording devices consist of two recorders and one transmitter. This kit is great for people who want to record clearly and wirelessly over a distance.

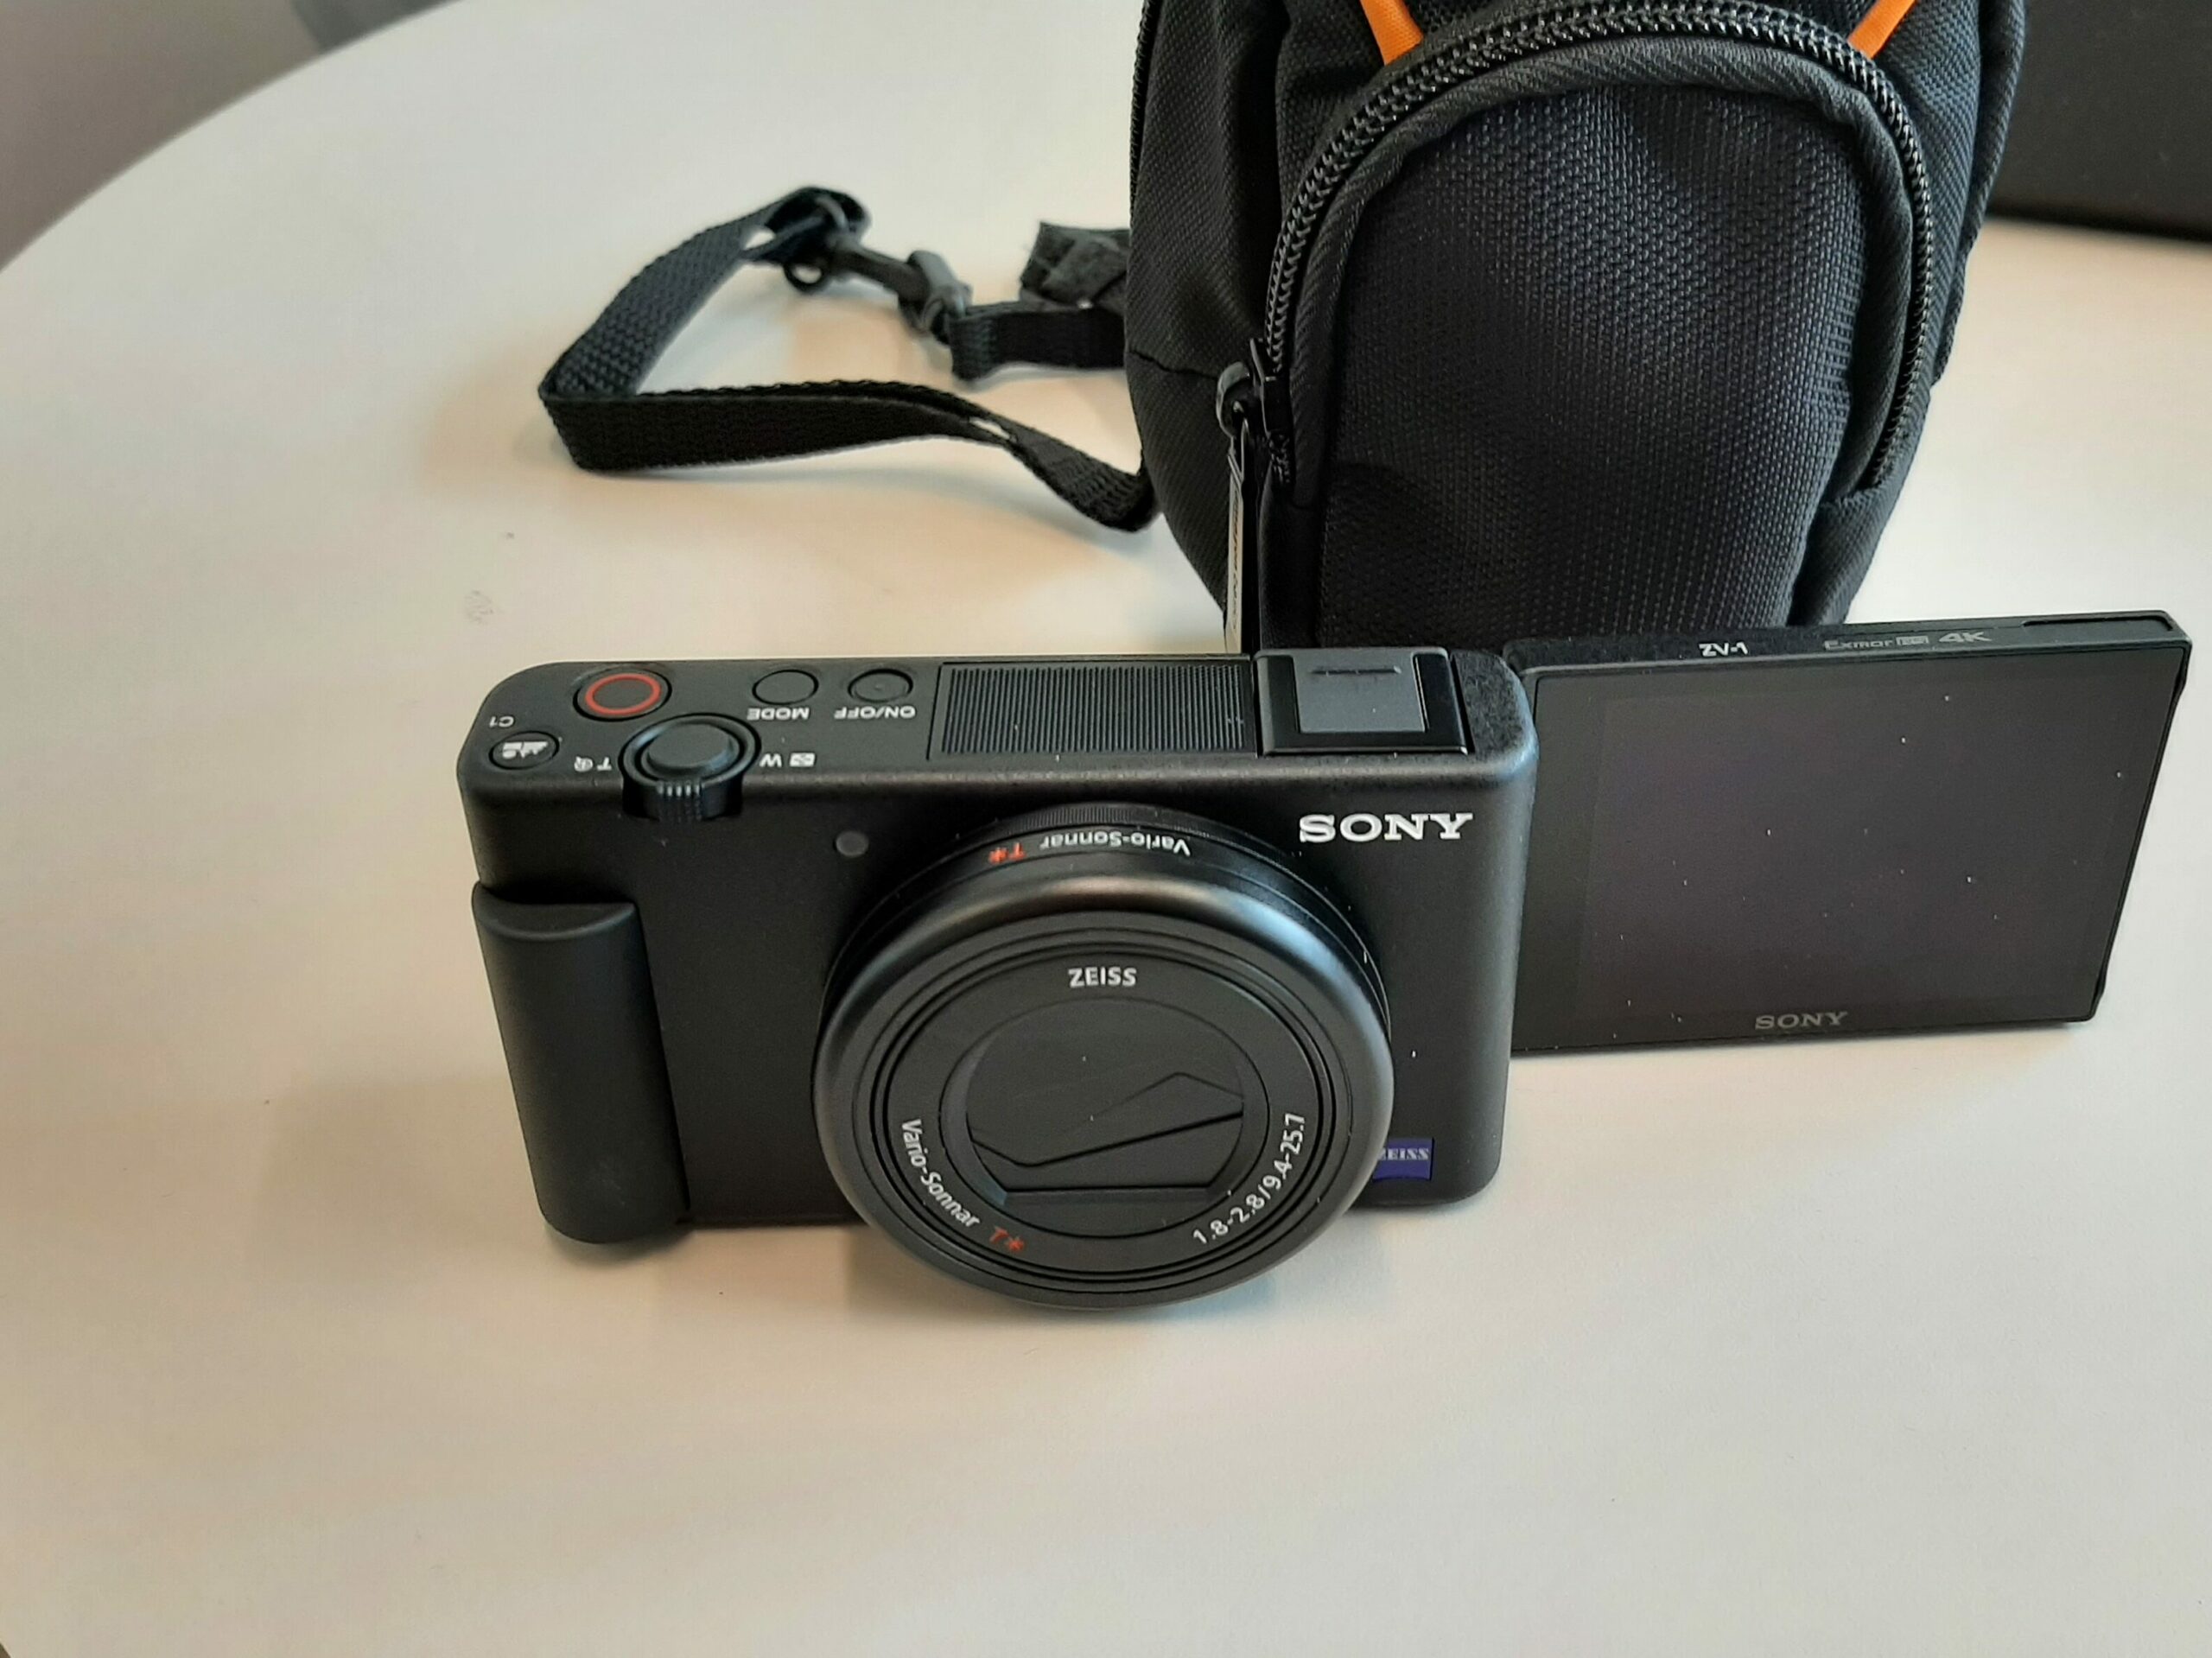
Sony ZV-1 Digital Camera

These are powerful pocket vlogging cameras for taking videos or pictures. They can be paired with our Rode Wireless Go’s for crisper audio.

Troubleshooting:

These particular vlogging cameras are known to overheat when shooting in 4K and use a lot of battery life quickly. Please keep in mind these cameras are not intended for several hours of continuous shooting.

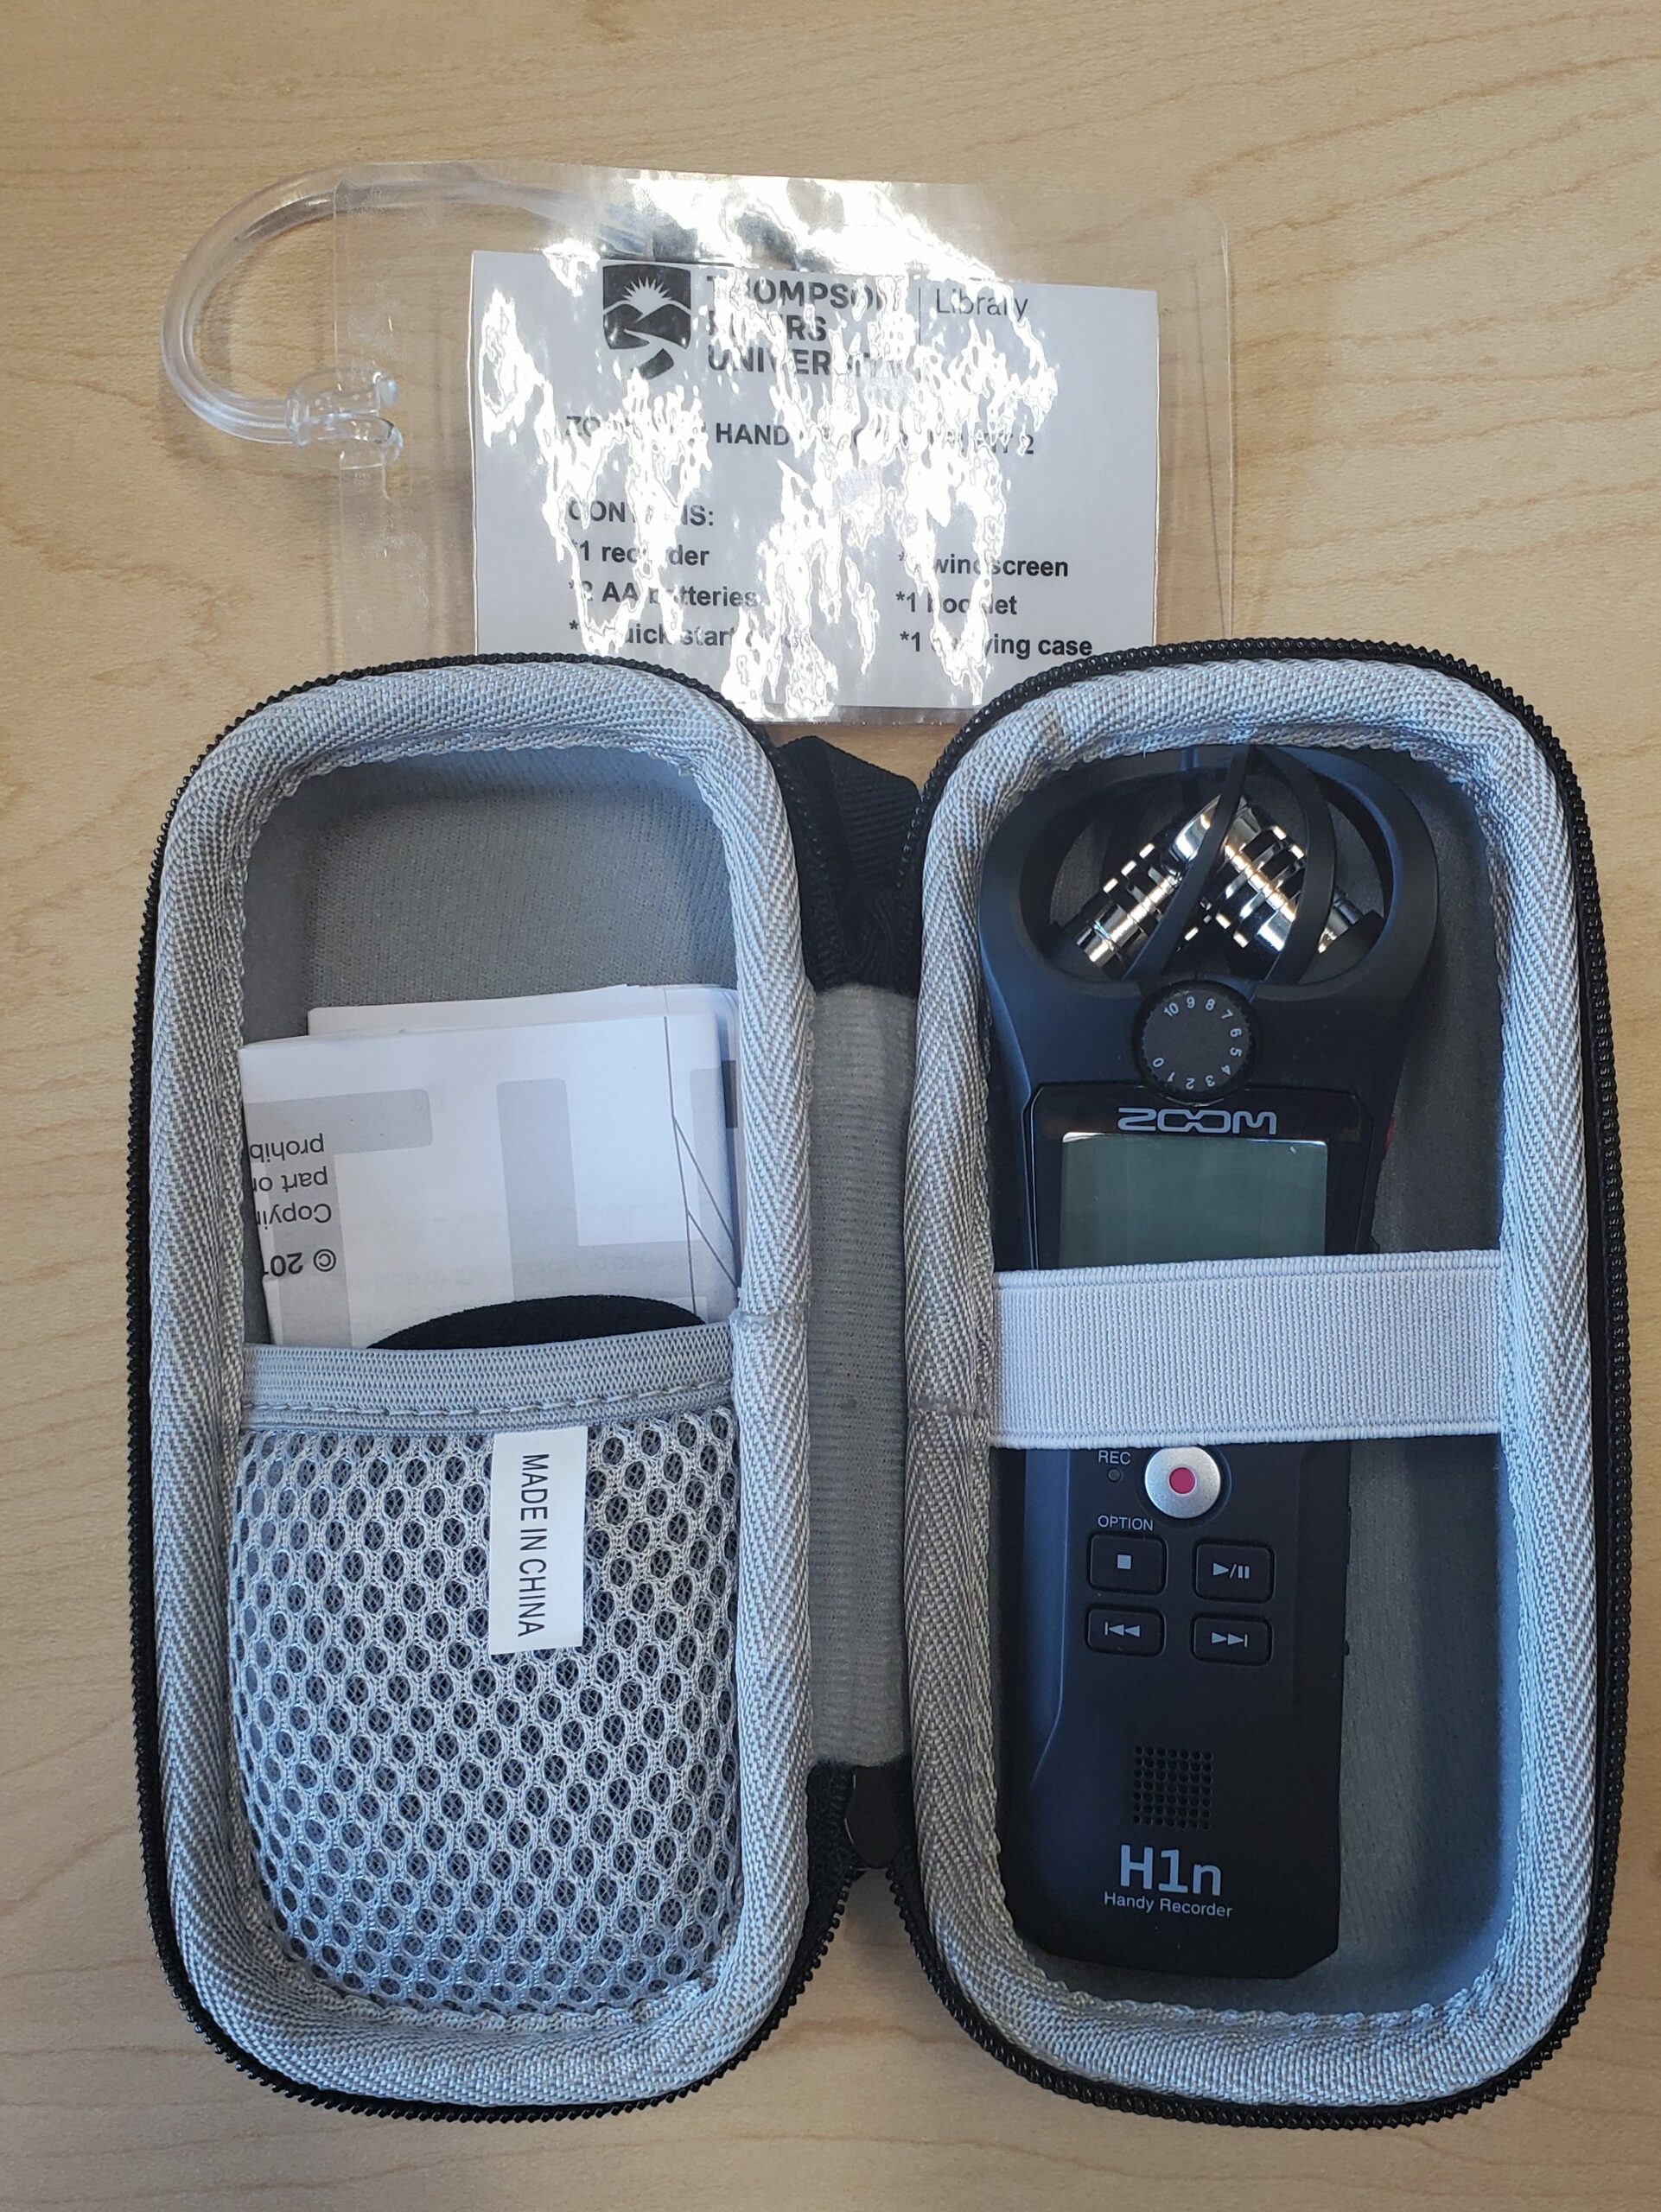
Zoom H1n Recorder

This is a small powerful portable recorder with a built-in mic for quick and easy recording. The H1n’s microphones capture high-quality stereo sound, supporting up to 24-bit audio at sampling rates of 44.1, 48, or 96 kHz in WAV and various MP3 formats. 

Project Posts

Take a look at some of the more recent projects our staff, student research assistants, or community members have made.