How to 3D print with PVA in between your model and your supports
First:
You must complete the Makerspace’s 3D print token tutorial prior to printing anything further https://makerspace.trubox.ca/2022/03/23/make-your-own-identity-token/
What is PVA filament and why use it?
PVA is a glue-based filament. When soaked in water, it slowly dissolves. Using it to build the supports for 3D printing your model reduce the scarring to your model and make the supports easier to remove. PVA is an expensive filament, so instead of using it to build your supports entirely, you must set up the printer to extrude only a small amount of the PVA in between the model and the supports. In addition to saving money, this also reduces the amount of time the PVA supports need to soak in water to dissolve and reduces the occurrences of print failures.
Printer requirements:
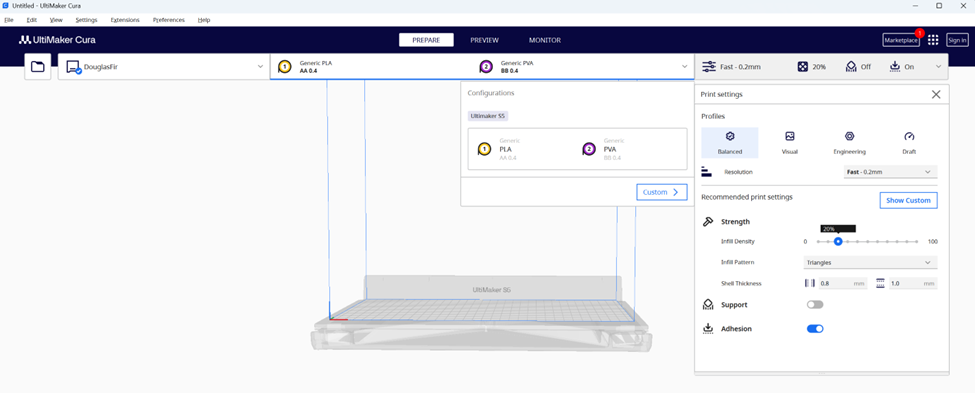
In the TRU Library Makerspace, Marmot or Douglas Fir printers can be used with PVA, so make sure one of those printers is available to use and request to be assigned the printer by staff. Load the coloured PLA filament you want to use into the printer into one of the print cores and load the PVA filament into the other print core. Turn on the printer and go to a computer and open Cura. Select your printer. Double check that the print core settings are correct. They should read as shown below:
Import your model:
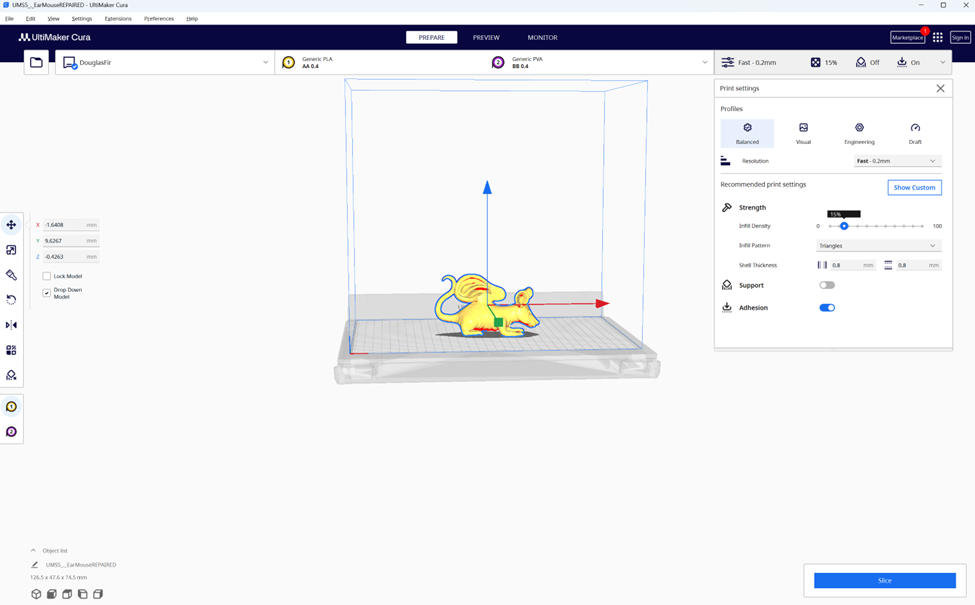
Import your object and orientate it as desired.
If you’re not sure how to do that, please reference this tutorial:
https://stc.wwu.edu/sites/stc.wwu.edu/files/2020-08/Cura.pdf
If the above link doesn’t work, go here: https://stc.wwu.edu/help-guides
And navigate down to the “Cura” guide.
Adjust your print settings:
Adjust your desired infill density, pattern and shell thickness.
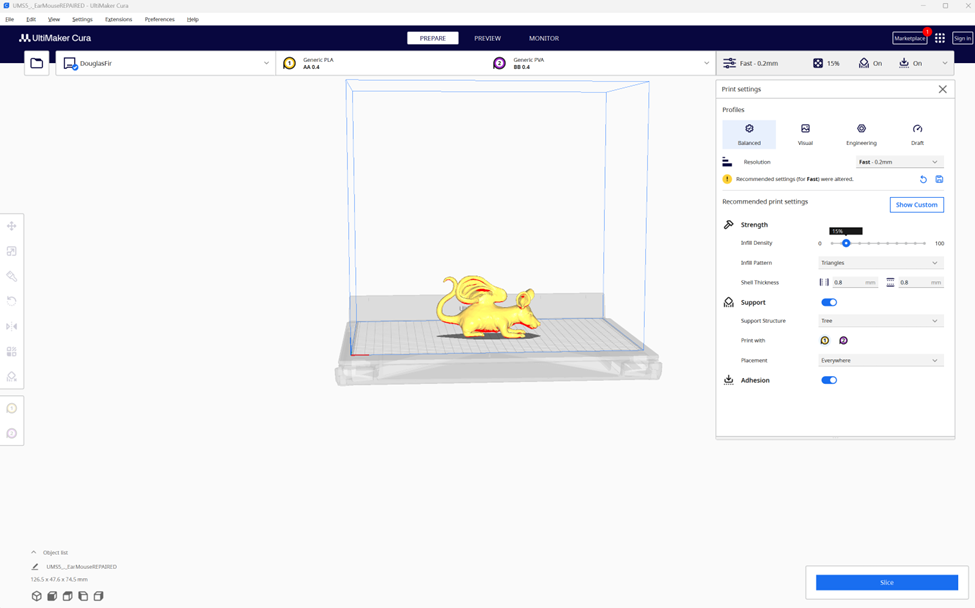
Make sure “Support” is toggled on, and select the support structure you would like.
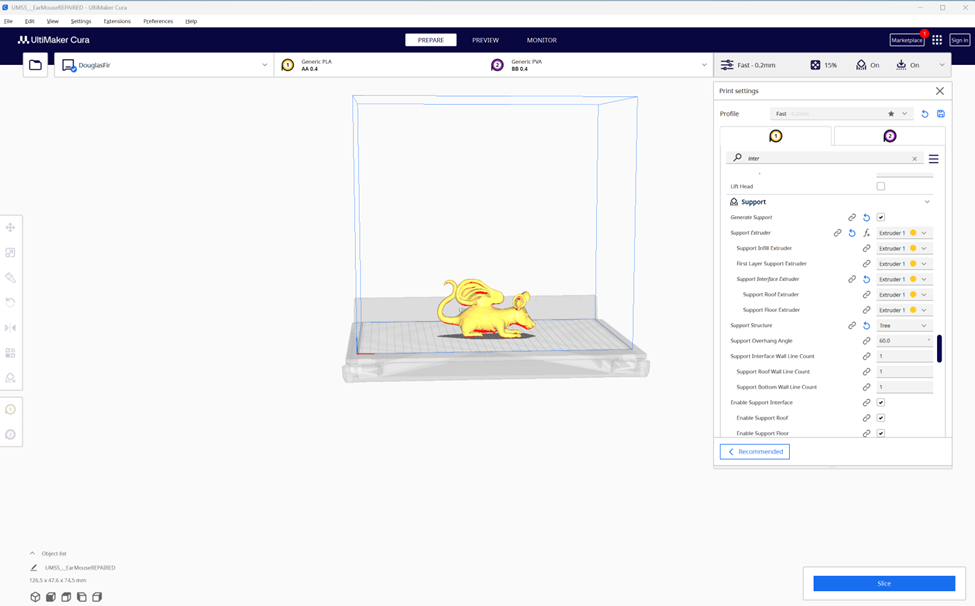
Under the support heading, also make sure that you select your PLA print core (not PVA) for the “print with” choice. For this model and set up, that is print core #1. Under “placement”, select “everywhere”.
You are NOT yet ready to print!
Click on “Show Custom”.
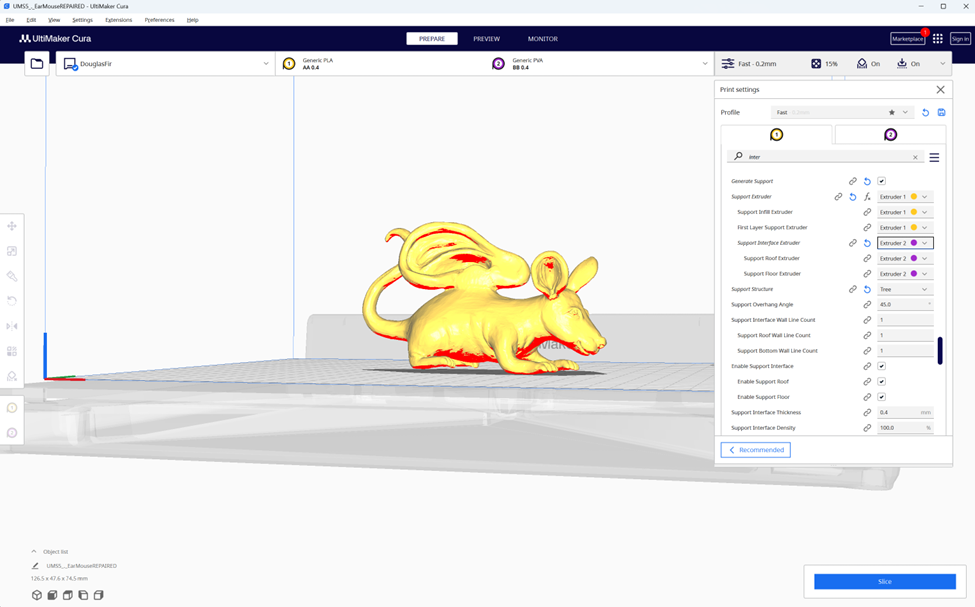
In the search bar, type in “Interface”.
Scroll down to find “Support”.
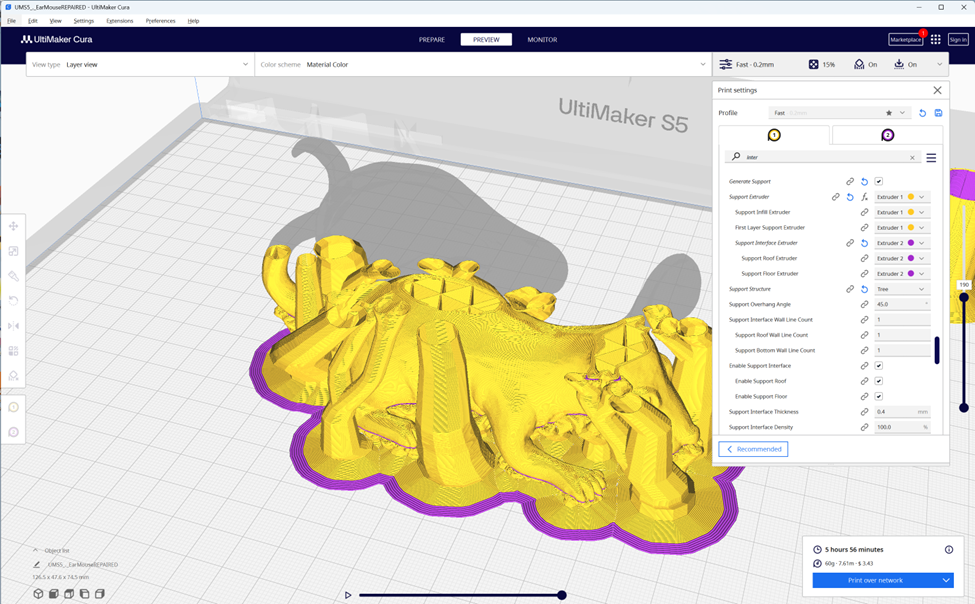
Under “Support Interface Extruder”, change it from extruder 1 to extruder 2.
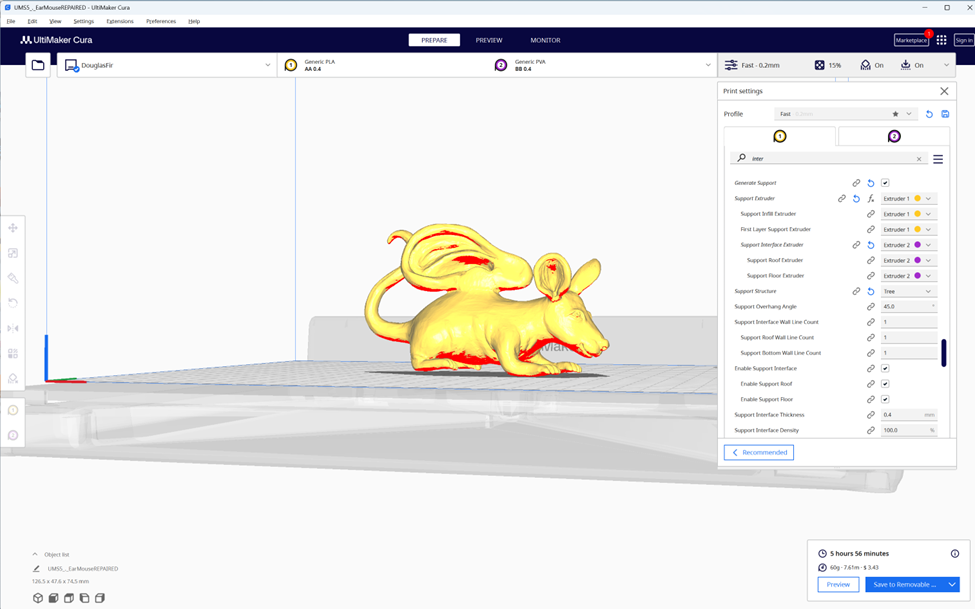
Now you are ready to Slice!
Press “Slice” in the lower right corner.
It will take a little time to slice. Be patient.
Then press “Preview” in the lower right corner (after you have sliced it). Or from the middle at the top of the screen.
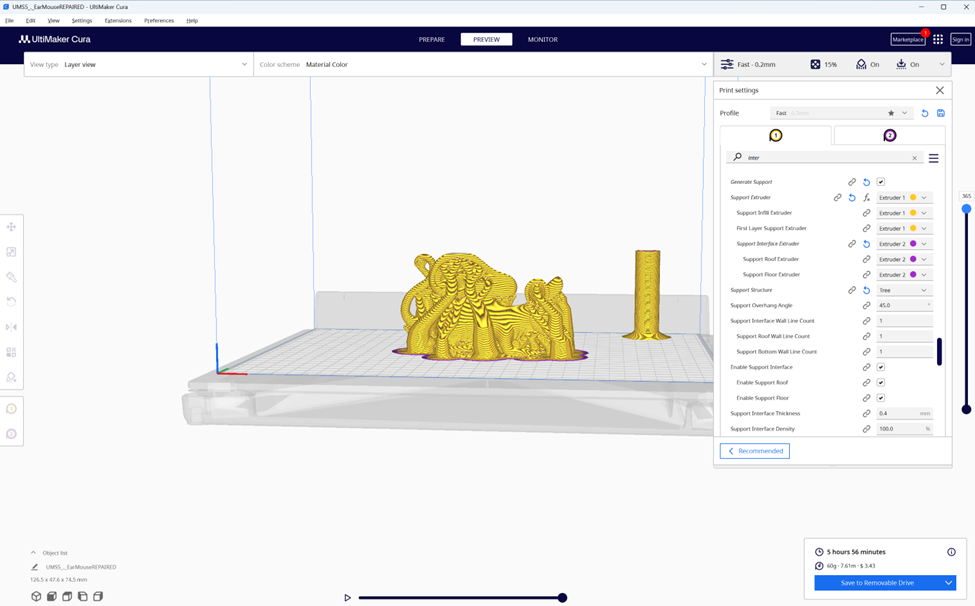
Check your model in the Preview mode.
If your settings are correct, your preview should show the model and the majority of the supports in the colour displayed on “extruder 1” (in this case yellow) and the small amount of PVA that will go in between your model and supports will show in the colour displayed on “extruder 2” (in this case purple).
You can look at the slicing of your model by moving the slider on the right side of the screen up and down. When you do this you should see where your PVA will be deposited. You may have to zoom in and/or rotate your model to see where the PVA is. It will truly be a SMALL amount.
You will notice a cylinder on your build plate that you did not put there. This cylinder is where the printer “cleans” its nozzle as it switches between filaments. You can dispose of it after your print is complete.
If your supports show entirely as the colour displayed on “extruder 2” OR your supports are entirely the same colour as your model without little bits of colour from “extruder 2”, you have done something wrong. Start over and pay close attention that you have selected the right settings.
You’re ready to print!
Find a staff member and get your print approved.
Refer to these guidelines for extra tutorials and rules and guidelines for printing:
Go to: https://makerspace.trubox.ca/technologies/3d-printing/
Scroll down to see “rules and guidelines”.
Once you have staff approval: Select “print over network” from the menu in the bottom right corner.
Sometimes prints fail. Using PVA increases the chances of print failure. Make sure you check in on your print – you may have to re-print.
Once your model has printed, soak it in water overnight, then remove the remaining PLA supports. If there still appears to be PVA on your print, put it back in water to soak some more. Sometimes when you soak a print, water gets inside the print. Place it on a towel to let it drain and dry.
Tutorial provided by Twyla Exner, Visual Arts