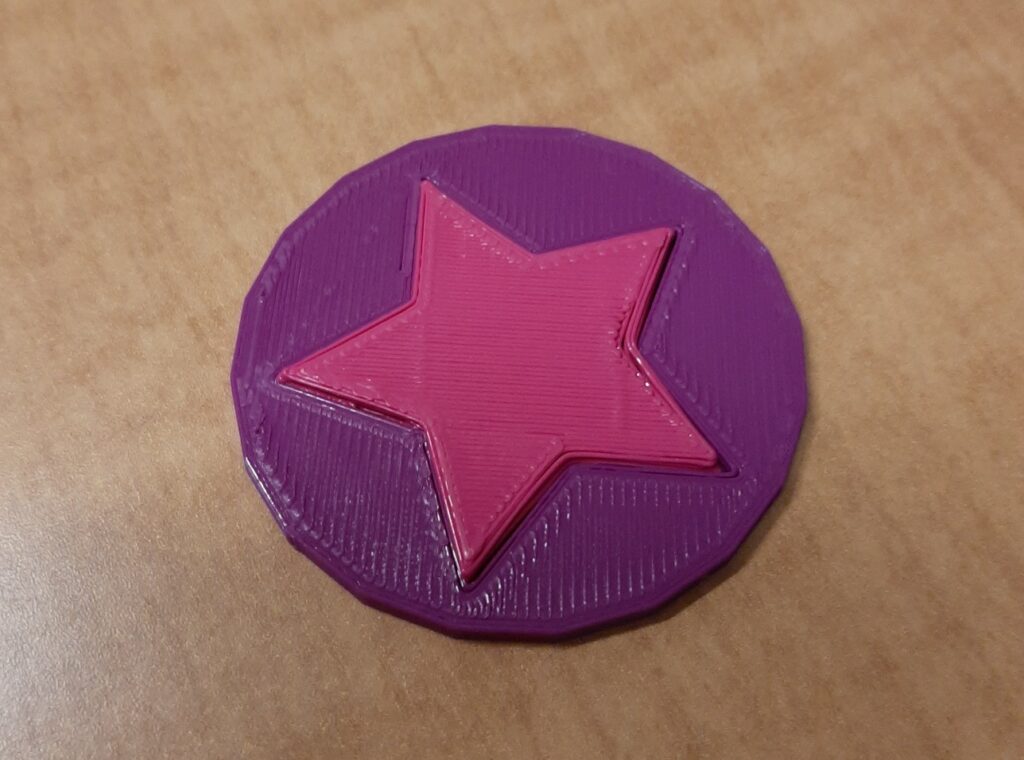

3D Print in 2 Colours
Makerspace has 4 Ultimaker 3D printers. These printers have 2 extruders on them, which means each extruder can have a different colour. This allows users to create designs that can have multiple colours in them! If you would like to learn how to print objects with 2 colours follow the steps below! We will be using Tinkercad for this project and it will be based on the identity token project all new users have to create.
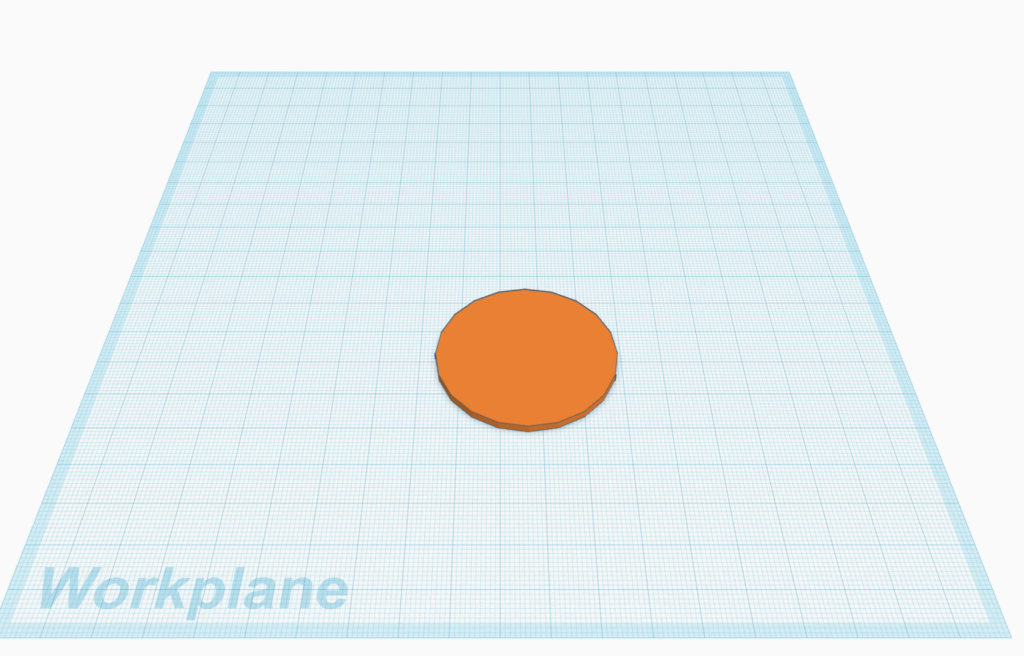
- Once you are logged into TinkerCAD select a cylinder and drag it onto your workplane. Change the size until it is approximately 40mm wide and long, and 2mm high (this does not have to be exact)
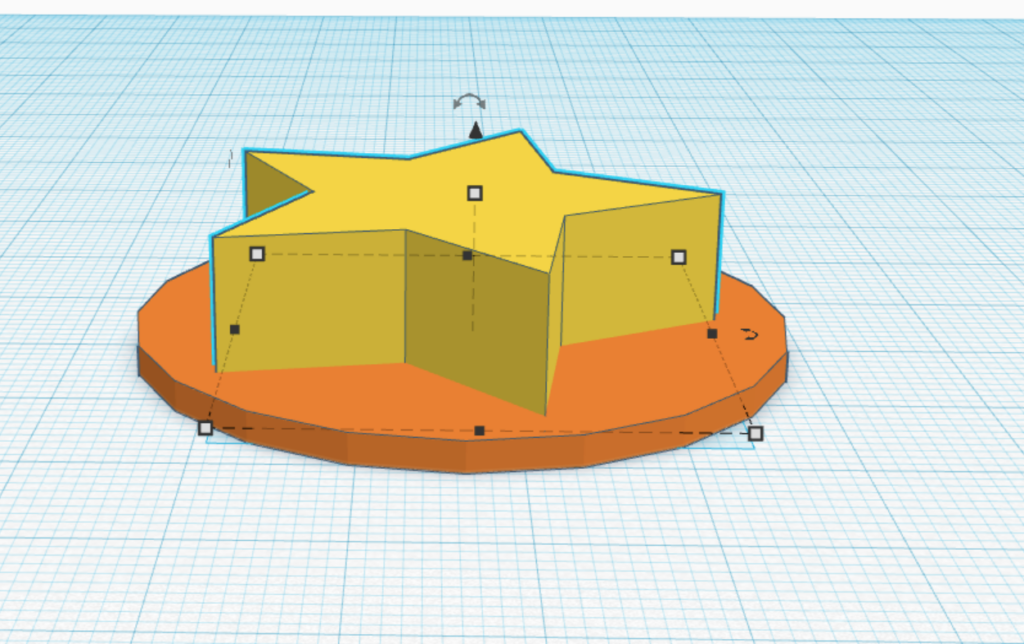
2. Choose another shape, or some text and put it on the workplane. Raise the new shape using the small black arrow until it 1mm up so that it is not level on the workplane. Make your raised shape or text into a hole instead of a solid from the right corner.
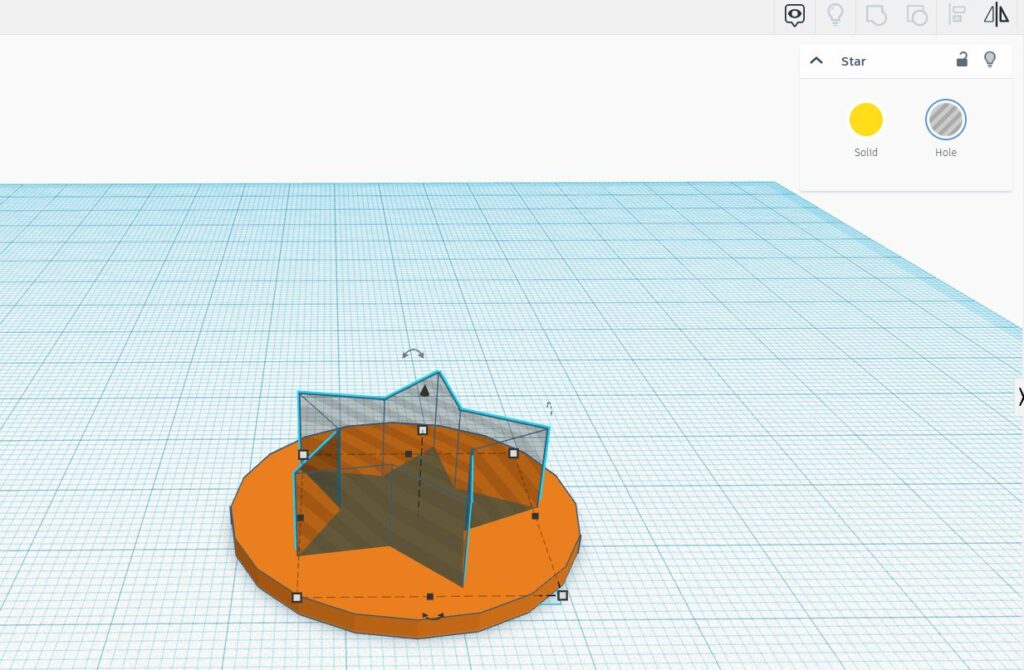
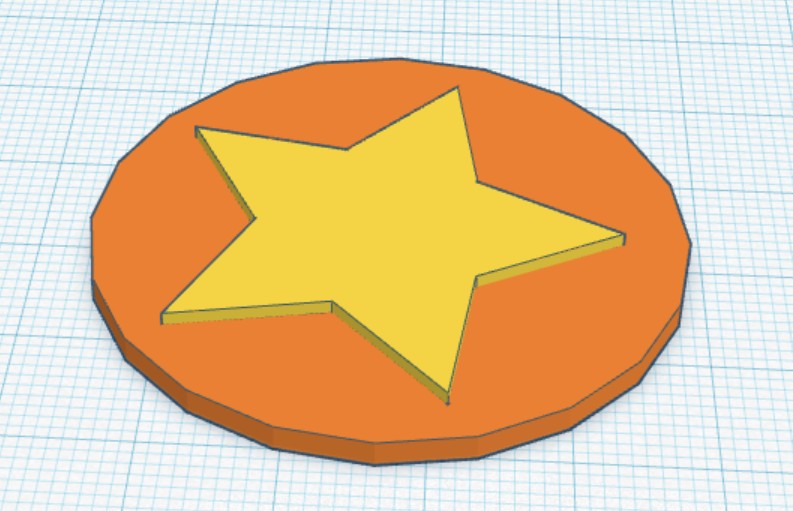
3. Copy and paste the shape that is a hole (star) so you have 2 and make one solid again. Select both your cylinder and hole and click “Group” on the top right or press ctrl + G.
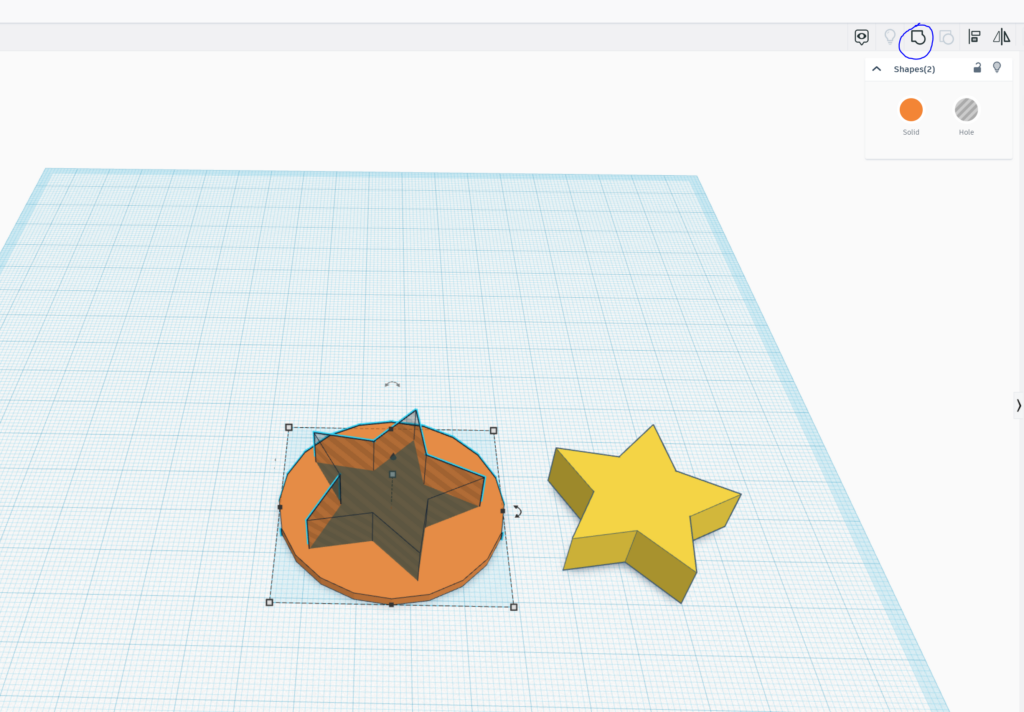
4. Make the solid star thinner, and arrange it into place on the cylinder where the grooves are from the hole you merged into it
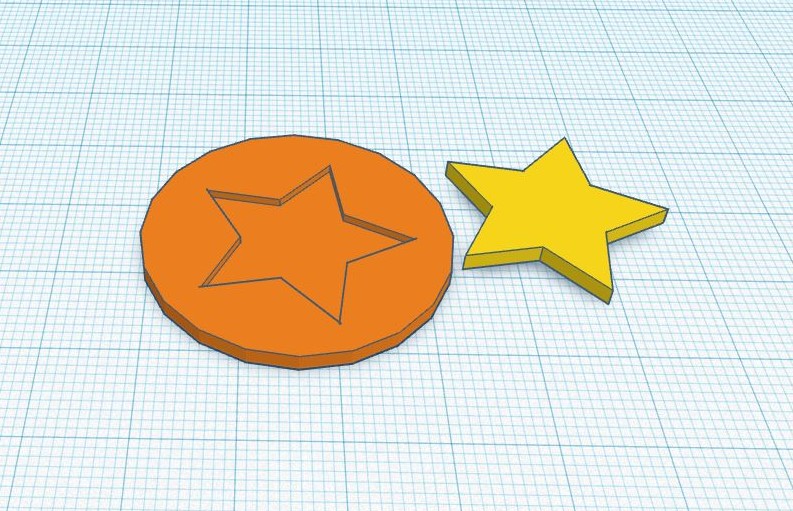
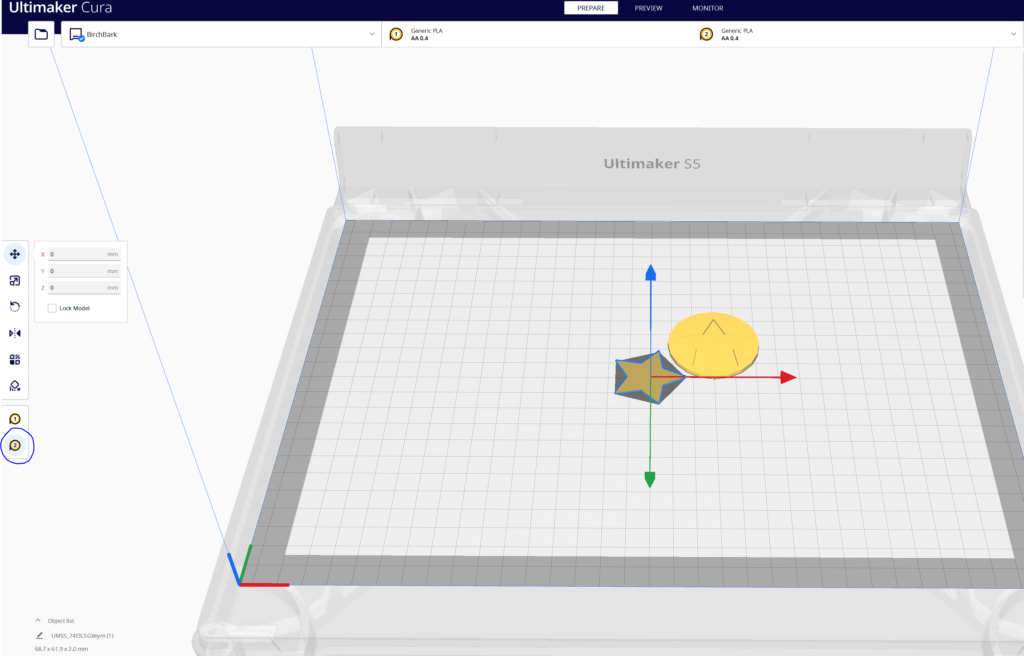
5. Select one model at a time and export them separately. Open Ultimaker Cura and open both models. At this point make sure you have been assigned a printer from a staff member and check what colours are in the 3D printer and which extruder they are in. Select one of your pieces and select it to print from extruder 2 on the left. You will notice that the colour of yellow changes once you select a different extruder.
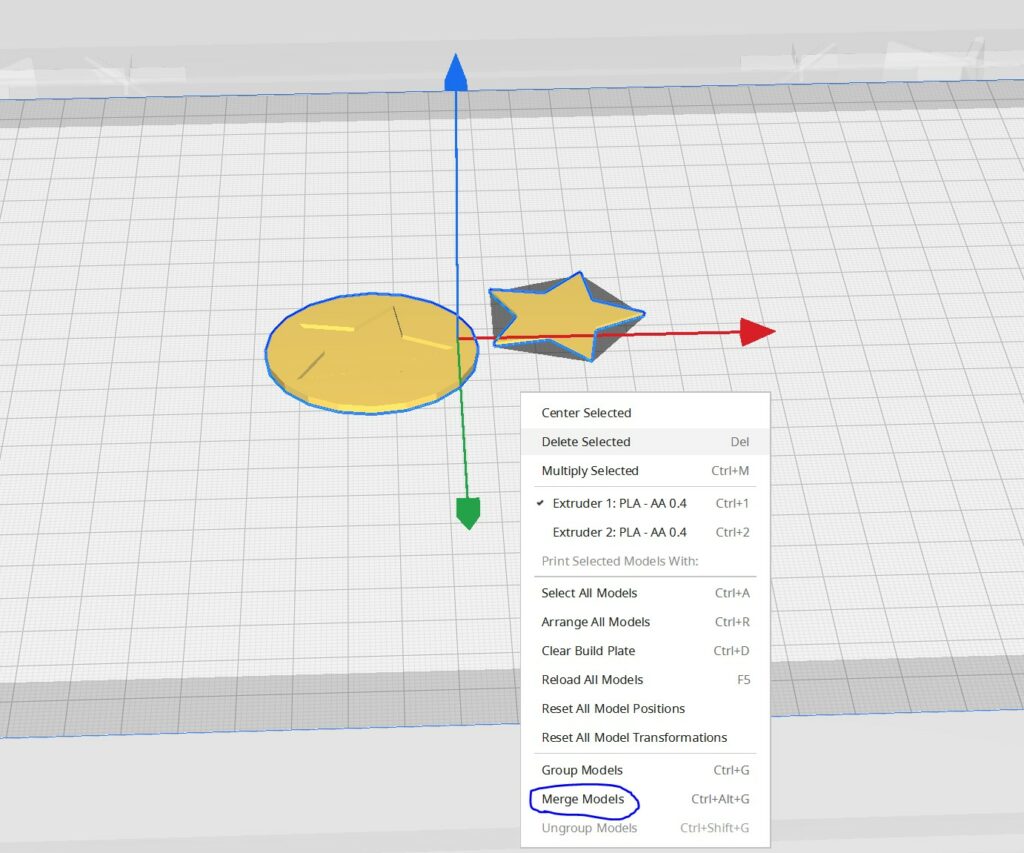
6. Right click a choose “Select All Models”. Right click again and choose “Merge models”
7. Slice your model and print to your assigned printer.
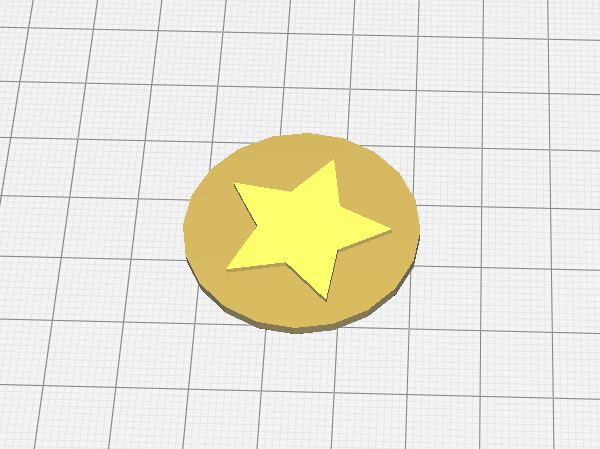
Congrats! You printed your first design using 2 colours!