
A Tail of 2 Failed 3D Prints: Printing Complex Objects
by Franklin Sayre, Makerspace Librarian
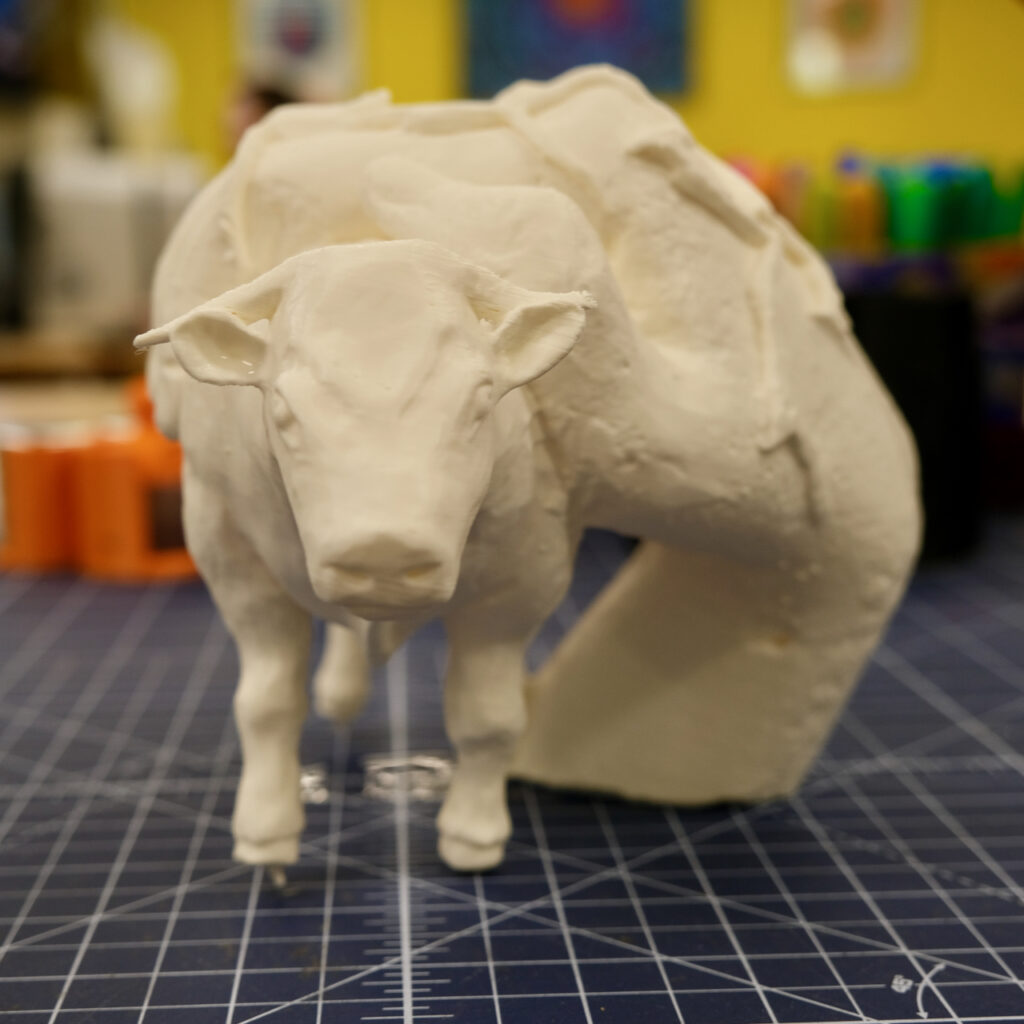
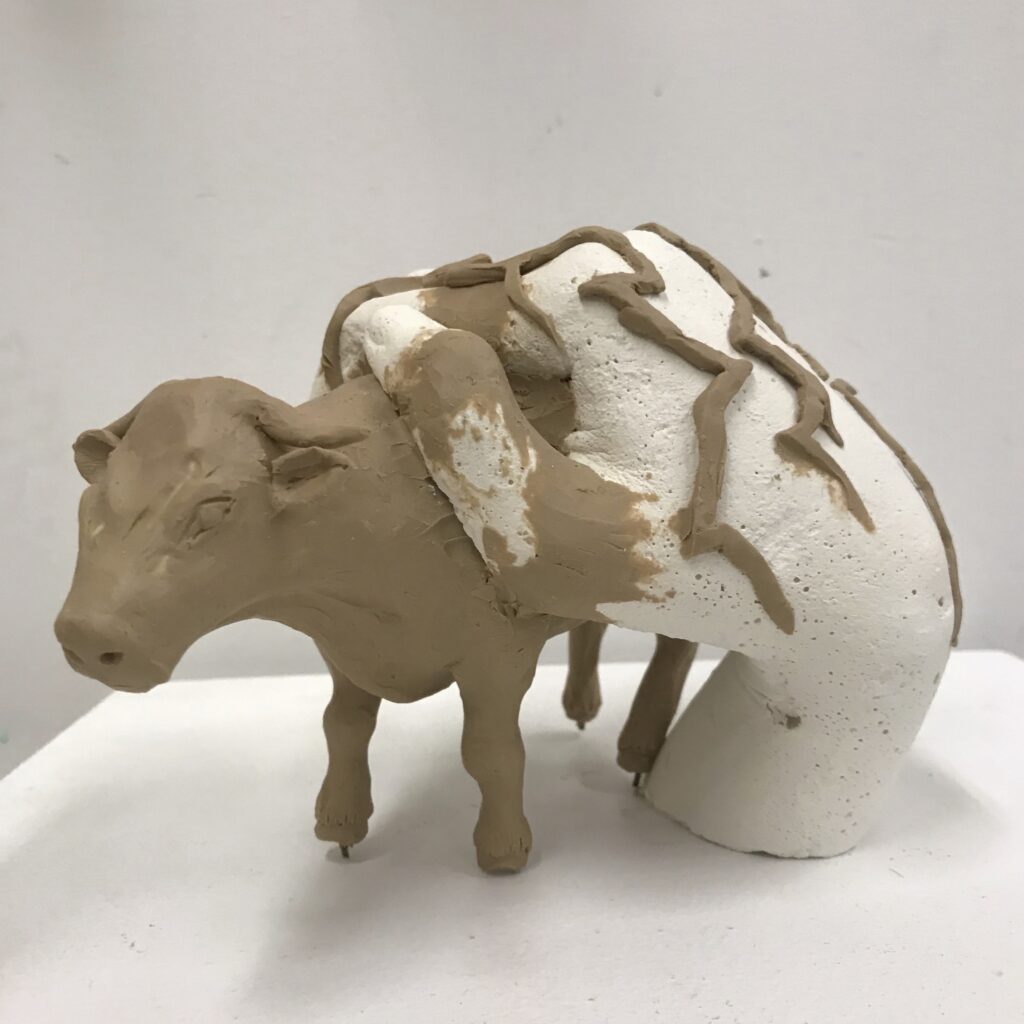
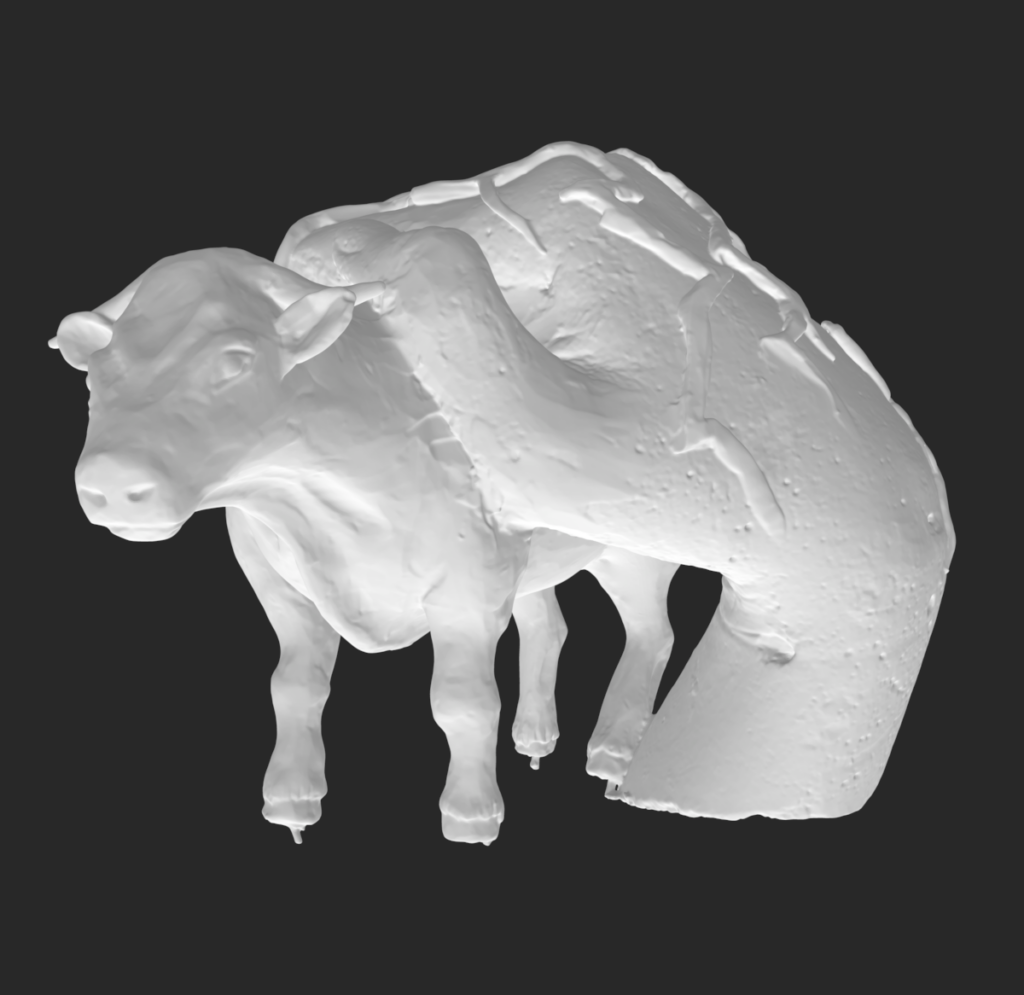
It can be hard to 3D print large, complex objects. Longer print times, more complex objects, and multiple material types lead to more failures. Recently, I printed a sculpture created by Visual Arts student Lena Franes for the Unmade Monuments assignment that demonstrates all of these problems.
Requirements
Large and High-Resolution Print
This object is going to be part of an art show for VISA students. After the show, it will become a teaching object we use in the Makerspace during tours. Because of this it needs to be full-sized and high-resolution.
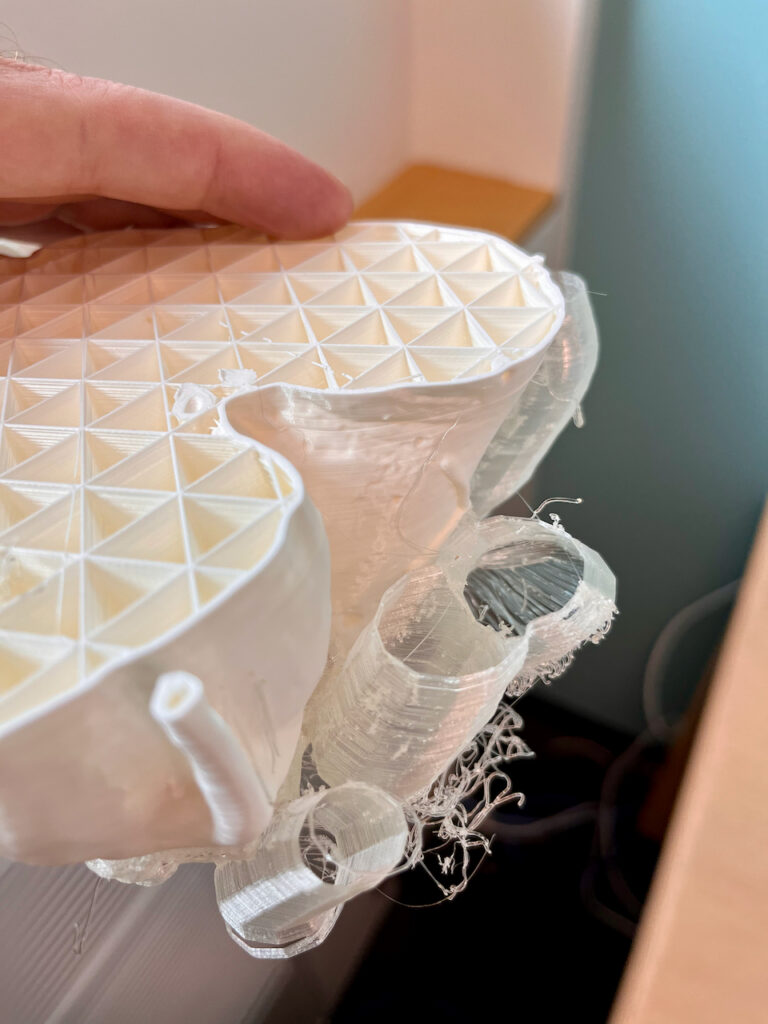
No scarring from support
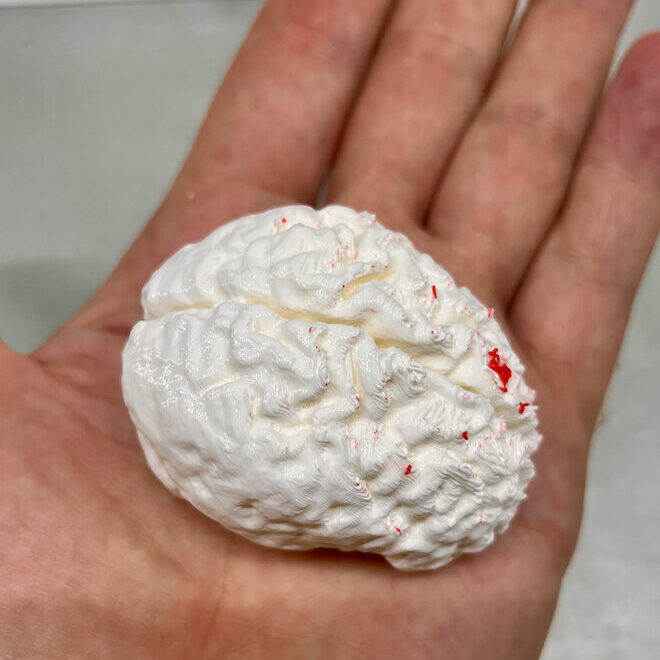
Objects with overhangs require support material. Usually we use PLA because it is easy to print with, and inexpensive. However, PLA can also cause scarring when the support material sticks to the object. Below is a good example of scarring using a print I made of my brain (yes, that is my actual brain, I had an MRI scan from years ago I was able to use). The brain itself is in white, and the red you see is the scarring from the PLA I used for support.
Normally it is fairly easy to remove this material after it’s finished printing by clipping or sanding it away, but for a production-level print that wouldn’t do. Instead, we can use a material called PVA for support. PVA is a water-soluble material that can be used for support and then will disappear when immersed in water. However, it is more expensive and more difficult to print with. In this case, we had to use it because print quality was so important.
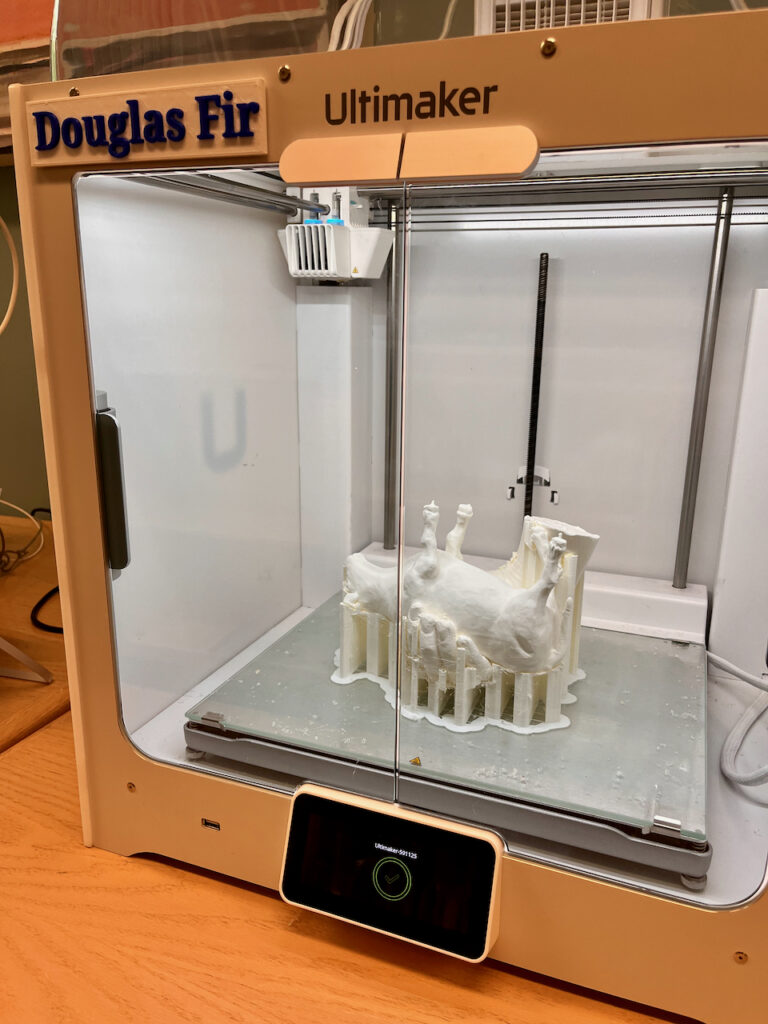
Two Failures
This print failed twice before I was successful. The first time it failed was because I printed it on our new Ultimaker S7 (Marmot) printer, which has a flexible build plate. You don’t use glue on this type of build plate, so its really important that you clean it first with rubbing alcohol to make sure the print will adhere properly. I forgot to clean the build plate so the print detached from the plate and stopped printing properly.
The second time the PVA supports failed. PVA isn’t my favorite material. It absorbs water from the atmosphere and becomes brittle (breaking easily) and stringy when it prints (as the water evaporates in the print core). Both can make it fail. Because this was a long print, it stopped printing some of the supports properly and we had to cancel the print.
The Solution: PLA Supports with a PVA Interface
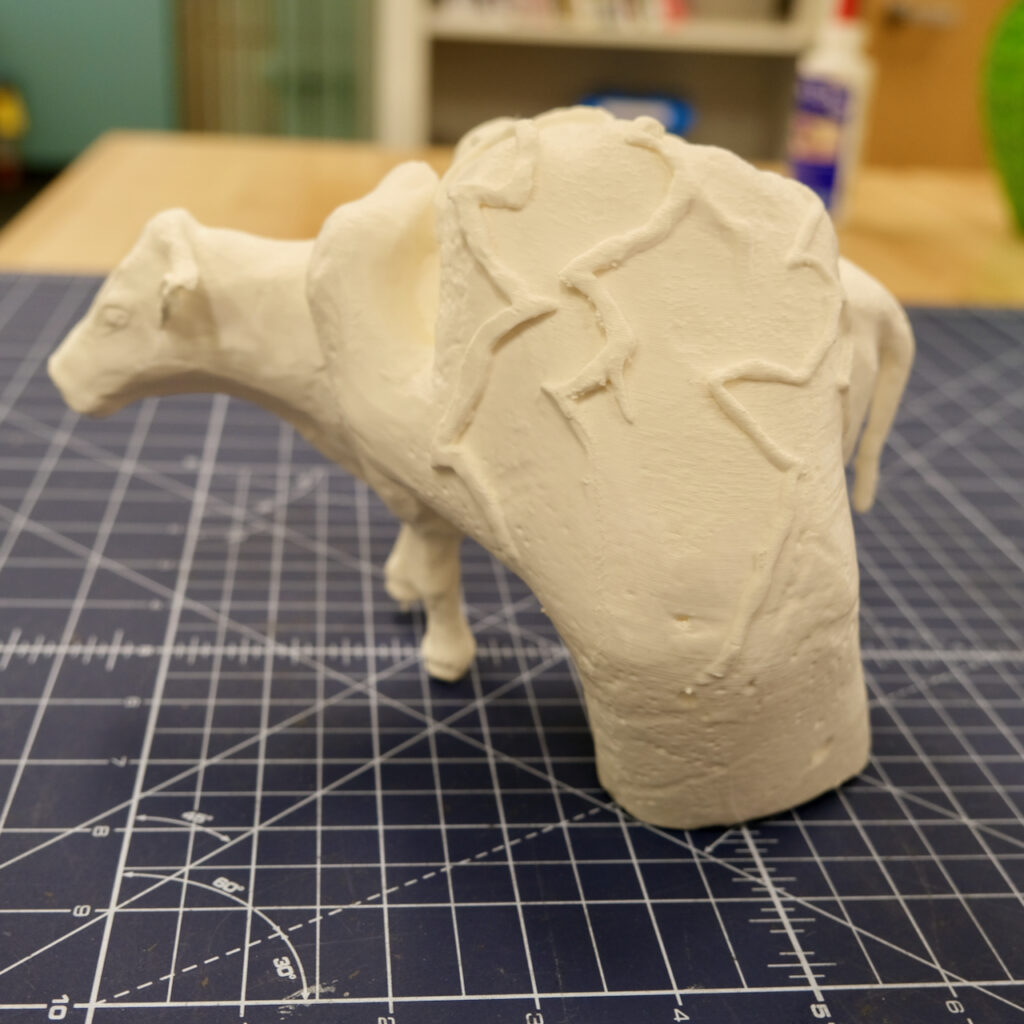
The third time I printed it, I changed strategies. There is an advanced setting within Cura that lets you print most of the supports with one material, and then use a second material just for the part of the support that touches the object. This is called interface support. It lets us use PLA to print the support towers, which is great because PLA is cheaper and easier to print with, and PVA only for the important parts.
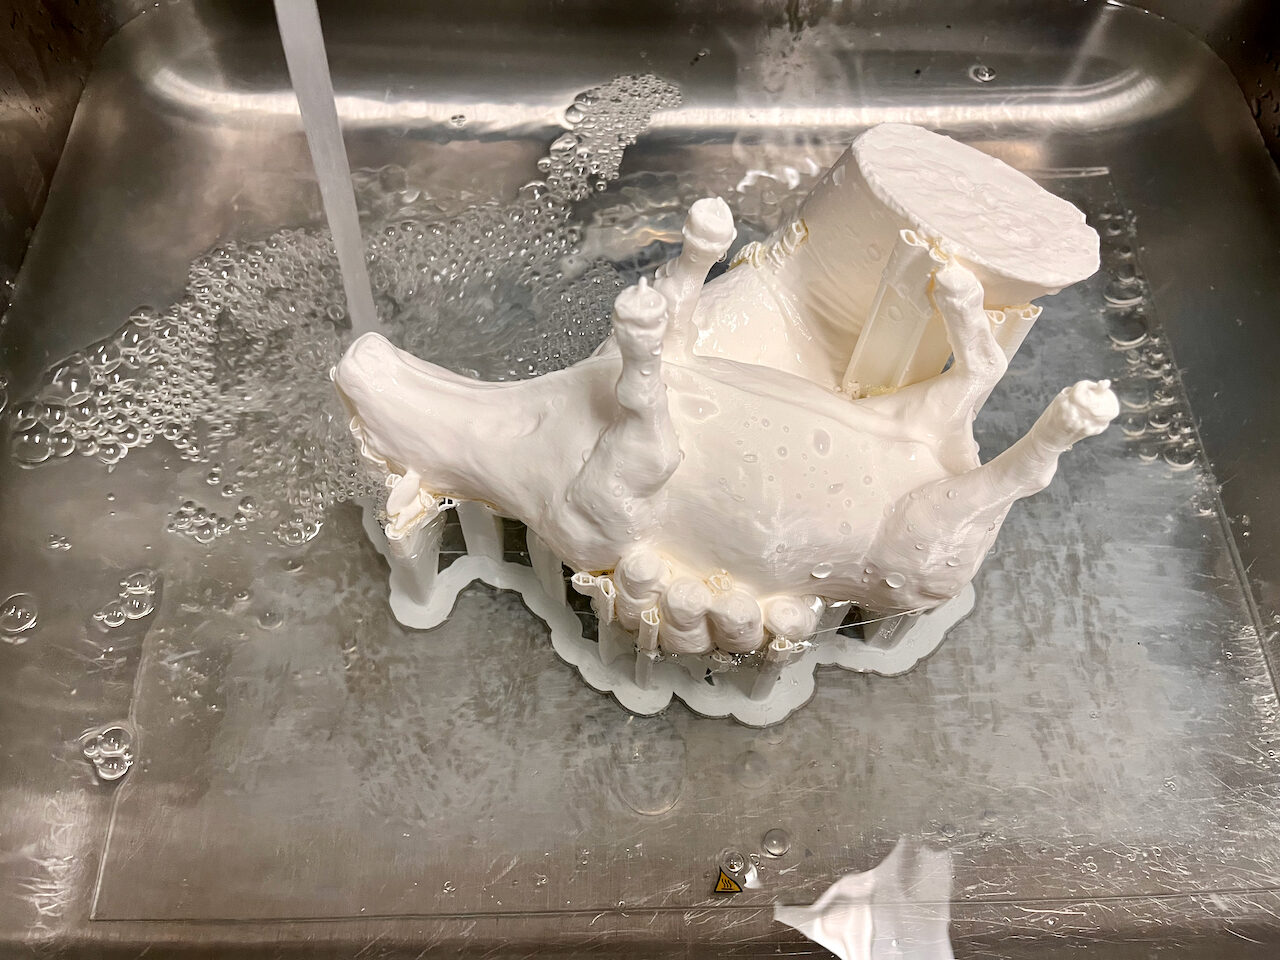
This time it printed perfectly and it was time for the cow to have a bath to get rid of that PVA. This was hard because the PVA was hidden under a thick layer of PLA, so it took 2 days of soaking the print, removing material, and soaking it again.
And here is the final result! Drop by the TRU Gallery the week of October 21 or the Makerspace after that to have a look!