
3D Scanning
This guide will help to walk you through using and understanding 3D scanning! 3D scanning is the process of taking a real-world object and rendering it to create a digital 3D model. Scanning and creating 3D models may allow you to use them in 3D rendering and design, 3D modelling, or 3D printing!
Let’s begin!
- First, Launch the “EXScan S” software.
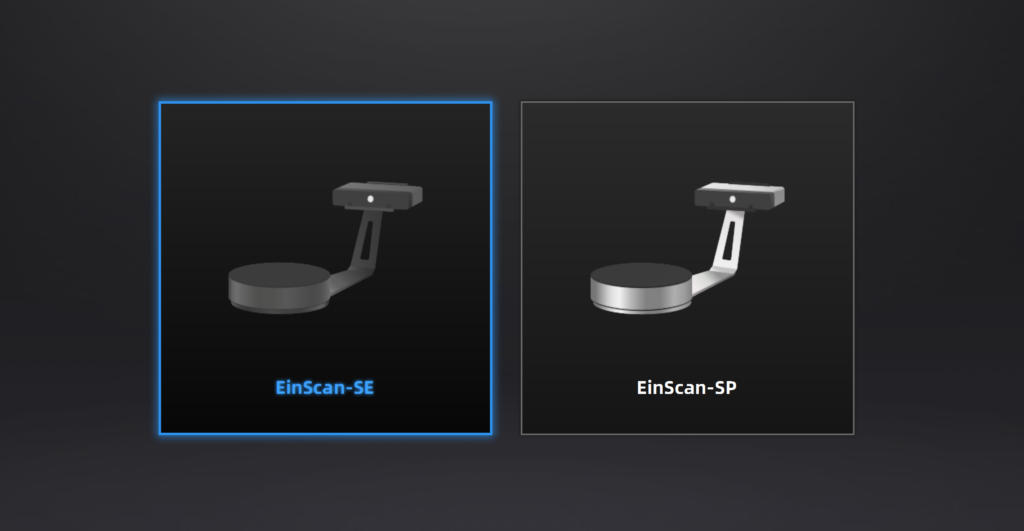
- A box will appear, Select “EinScan-SE.”
- Select “new work” for new projects, or “Open Work” if continuing a previous scan
- A Save As box will appear. It is recommended to save files to a new folder and labelled with your project name, otherwise you may have a cluttered file-space.
- A box will appear asking to select textured or non-textured scanning
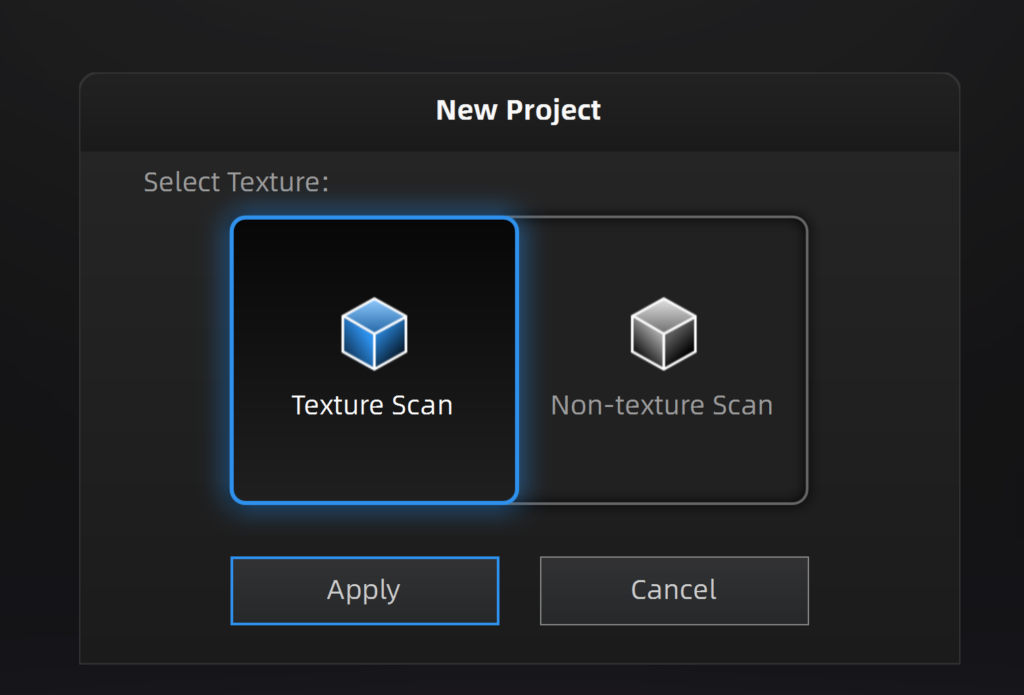
- Textured: scans full colour of the object and material texture. Only necessary for implementing real life objects into 3D sets/scenes.
- Non-Textured: scans in neutral colour and smooths surfaces. Perfect for 3D printing or having a basic 3D render of the item.
Note: either texture-choice will still allow you to 3D print the object, it just wont 3D print the colour.
- The screen should now display adjustable settings, and a preview of your object on the scan turntable. You can now adjust brightness, turntable rotations
- Brightness: For darker objects, increase brightness. For lighter objects, decrease brightness. You want to eliminate any over-exposed red spots without going too low. Set brightness just low enough until you can’t see any red “overexposure” spots
- Turntable Turns: Number of turns the scanner will perform. More turns could equal more precise scans. Additionally, turns can be divided into half turns, for more precision. Best to set x2 more than your desired number of full rotations.
- Turntable speed: The speed of rotation. Faster turns = faster scanning, but could cause less precision
- HDR: Acts as an auto brightness feature and can scan light and dark objects simultaneously.
- Once you have adjusted your settings, click the play button on the right-hand side of the screen. The scanner will now begin scanning. Make sure not to touch the scanner or item until the scan is complete.

- Once complete, you may wish to flip or shift the object on the turntable to scan other sides of the object (i.e., rotate the object so that the bottom of the object that was touching the turntable is now visible to the scanner). The scanner is smart! it will know how to align the object later.
- Repeating the scanning process.
- Once second scan is complete, adjust the object again if necessary.
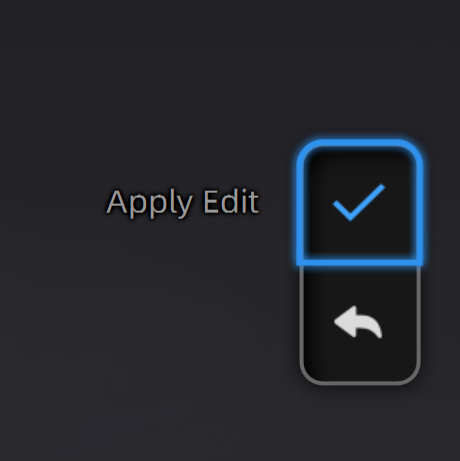
- After all scans are complete, click “apply Edit” on the bottom right-hand corner
- Now click the “global optimization” on the right-hand side (looks like a stop button). This function will hopefully align all the edges of the object to look uniform. It is best to optimize after each completed scan (i.e before and after you adjust the object on the turntable).
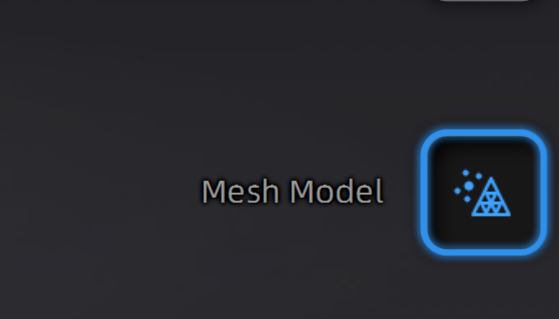
- Once you are satisfied with your full scan, Click “mesh model.” You can choose watertight or non-watertight. Watertight will intuitively fill any ‘holes’ that may be present in your scan. Non-watertight will mesh as-is.
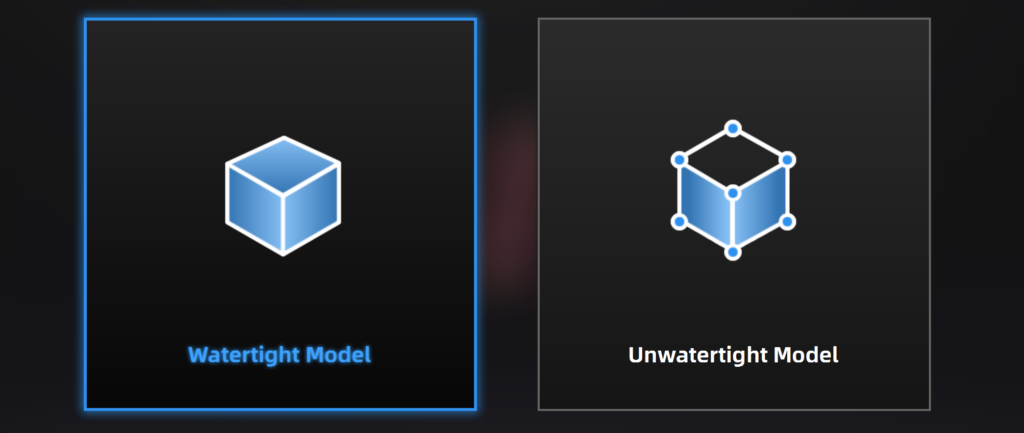
Note: You can choose watertight or non-watertight. Watertight will intuitively fill any ‘holes’ that may be present in your scan. Non-watertight will mesh as-is.
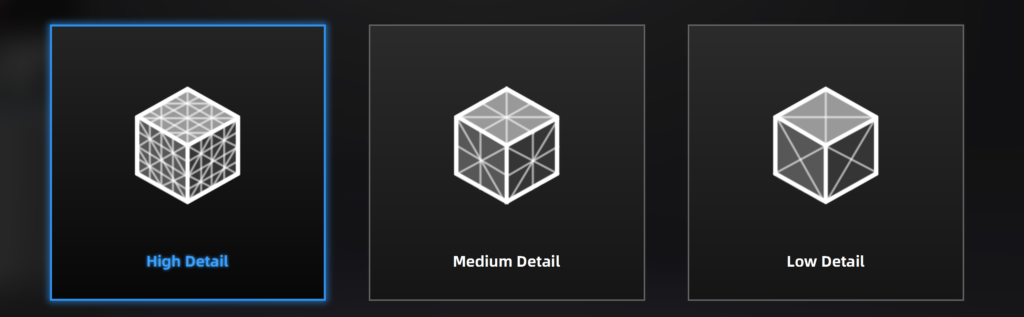
Note: You can choose the detail of the scan. High, medium, or low. High detail includes more scan points, low detail includes less, medium is in-between.
- The Software will now mesh the data, it may take a moment.
- There may be some edges or artifacts that need to be deleted. Using shift + left mouse button, drag to select items you want to delete. Click “Delete selected data”.

- On the right-hand side of the screen will be buttons to Sharpen, Smooth and Simplify the design. You may wish to use these to give your project more or less visual definition, or to cut back on file size.
- Once edits are complete, click Export Your Scan, then “Save mesh locally”.
- A save box will appear, choose a location to save it to. You can save in multiple formats if you wanted to both 3D print it and use it in 3D design.
- STL: better for 3D printing
- OBJ: better for 3D modelling and animation.

Note: When closing Einscan, it will warn you of an unsaved project. If you’ve already saved and verified the file was saved correctly, you can ignore this and continue closing the program.
Additionally: If you wish to 3D print the object, you will need to reserve a 3D printer and get approval to print your object. If you need assistance, please see our walkthrough on 3D printing or ask a Makerspace employee!
Now you are ready to use your 3D Scanned object for however you wish to use it!
Links:
https://www.einscan.com/wp-content/uploads/2020/05/EinScan-SE-Guidebook.pdf
https://3dtechnology.ie/wp-content/uploads/2019/05/EinScan-SE-User-Manual2.6.pdf
Dalton Hargreaves


I am OVER-THE-MOON impressed with Maker Space and the staff! I have been waiting for this all my life! Since I am making two anatomically correct babies I am now fully engaged! So glad to be here!
Cheers…Elon