
Guest Post: Freehand Drawing Shapes for Tinkercad by Syreena Bhattacharya
If you’re wanting to 3D print a simple design that you have in mind, drawing it might be the way! There are a couple of different ways you can do this using Tinkercad, the main software our Makerspace visitors use to import their designs to our printing software. (You need to make a free account to use this, however.) One uses your own touch-screen device, such as an iPad or a Surface with their corresponding styluses, and the other uses technology that is freely available for use within the Makerspace.
Method 1: Using Your Own Technology
Step 1: Navigating Tinkercad
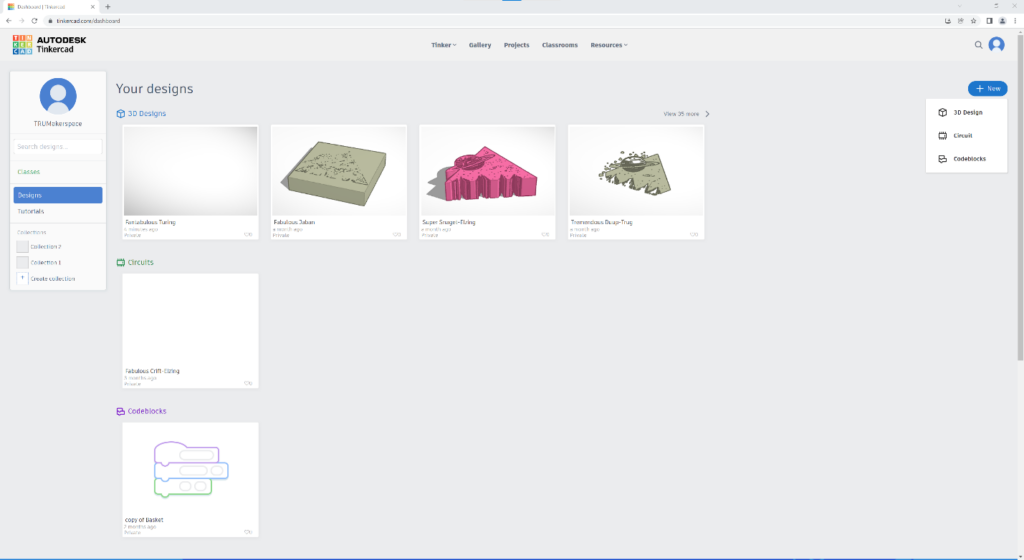
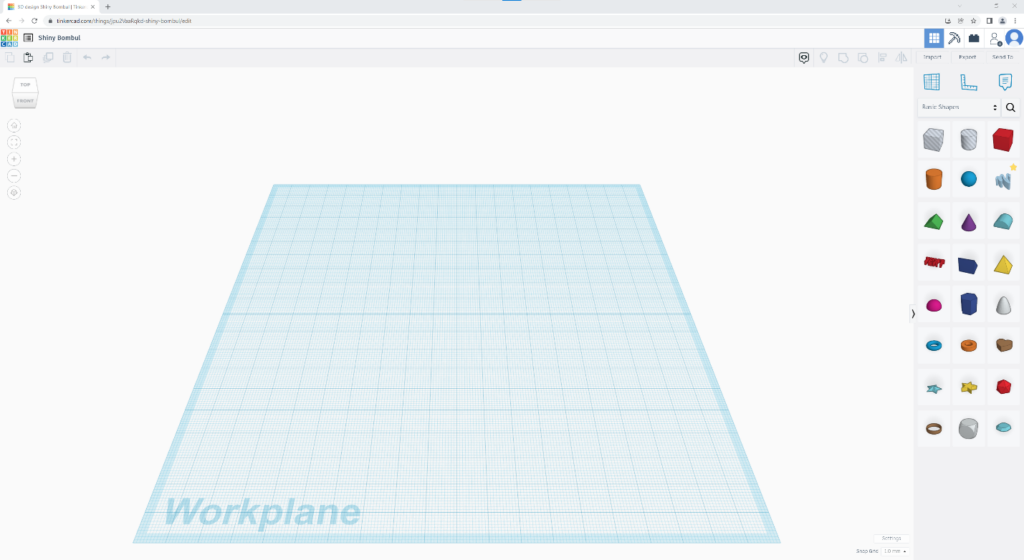
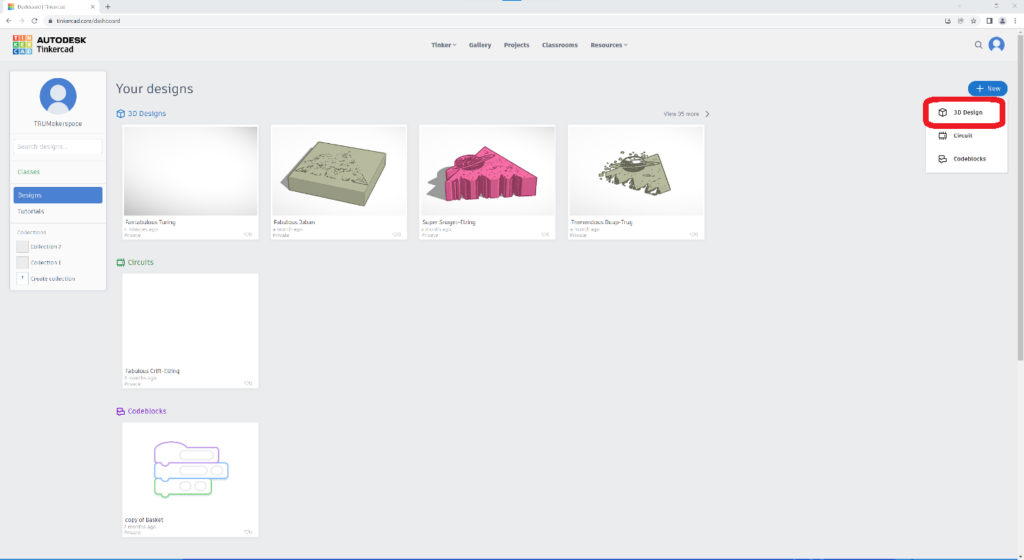
Start by opening the Tinkercad website on your personal device in the web browser of your choice. Google Chrome is generally the preferred browser for this, but Safari and Microsoft Edge also work. Select the “New” button on the top right and select “3D Design” to begin your project. This will open the Tinkercad canvas.
Step 2: Selecting to Draw a Project
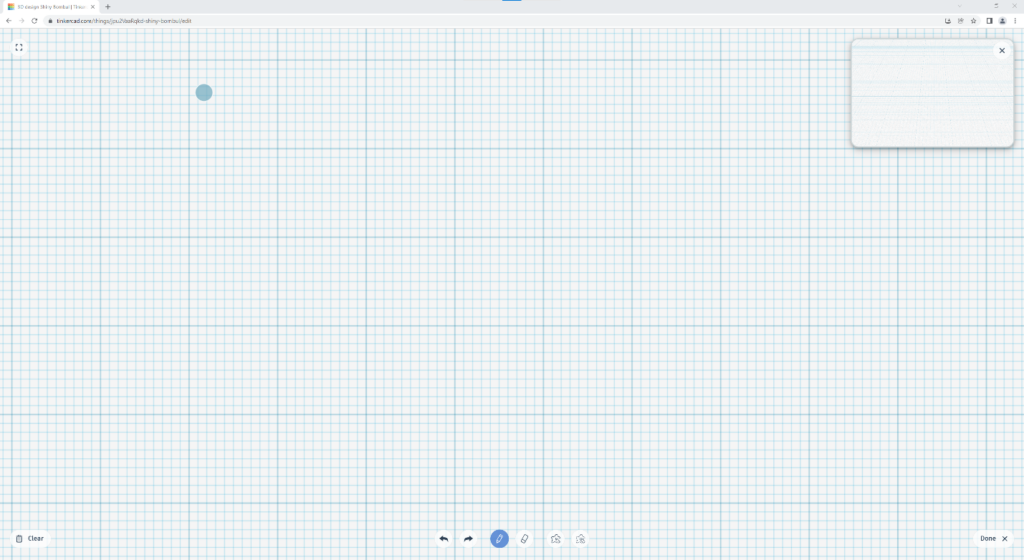
On the right sidebar there are a variety of basic shapes you can choose from. To create your own design, select and drag the “Scribble” style onto your canvas. Upon releasing, a close-up of the canvas will appear.
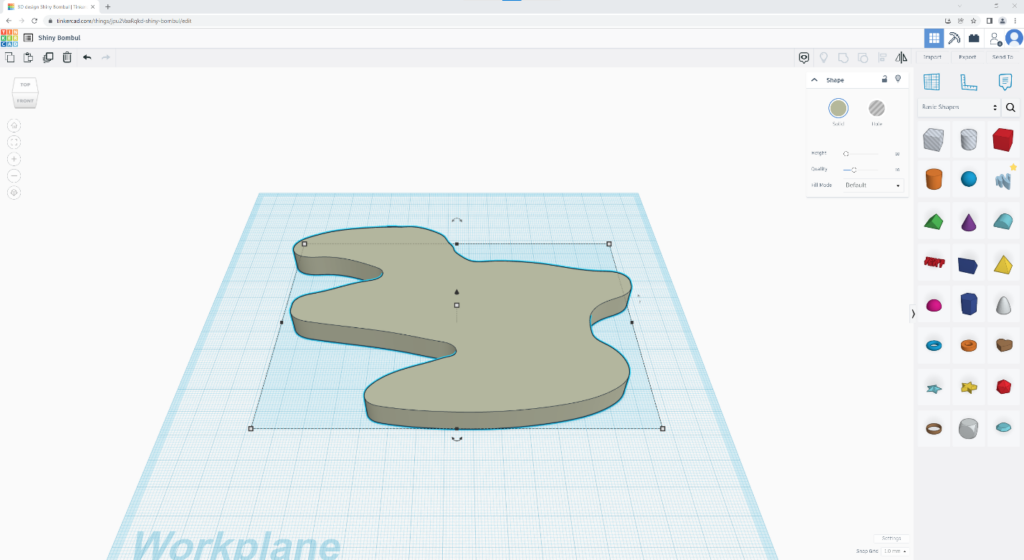
Step 3: Drawing Your Project
This is where the real fun begins! To draw your project, simply draw the shape you want to design using your device’s stylus in one or several brush strokes. When you lift the stylus from the screen, a preview of your shape will appear in the top right corner, which you can minimize if you need more space.
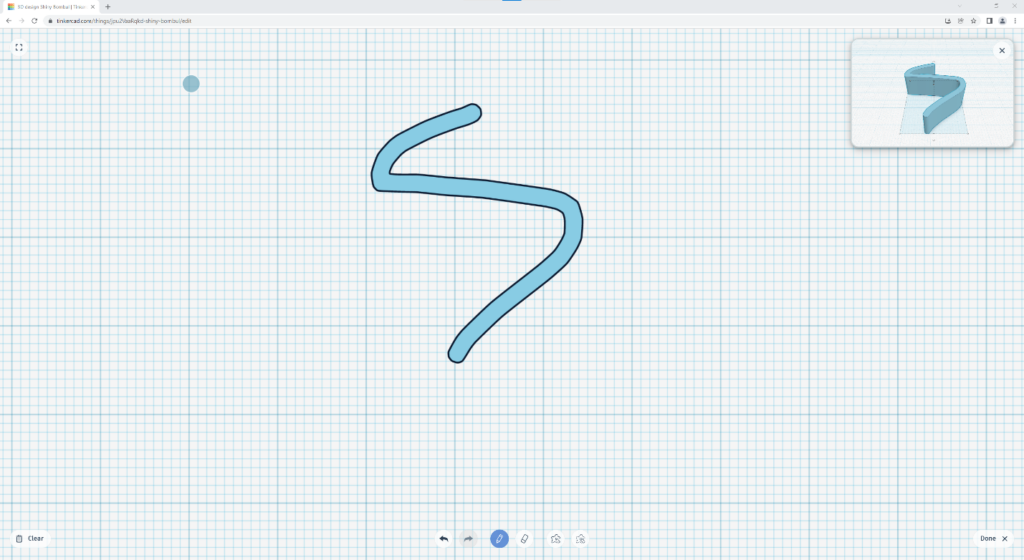
You can choose whether to draw a line that will automatically fill using the pen icon, or to draw a custom outline that will then fill in using the squiggly pen icon.
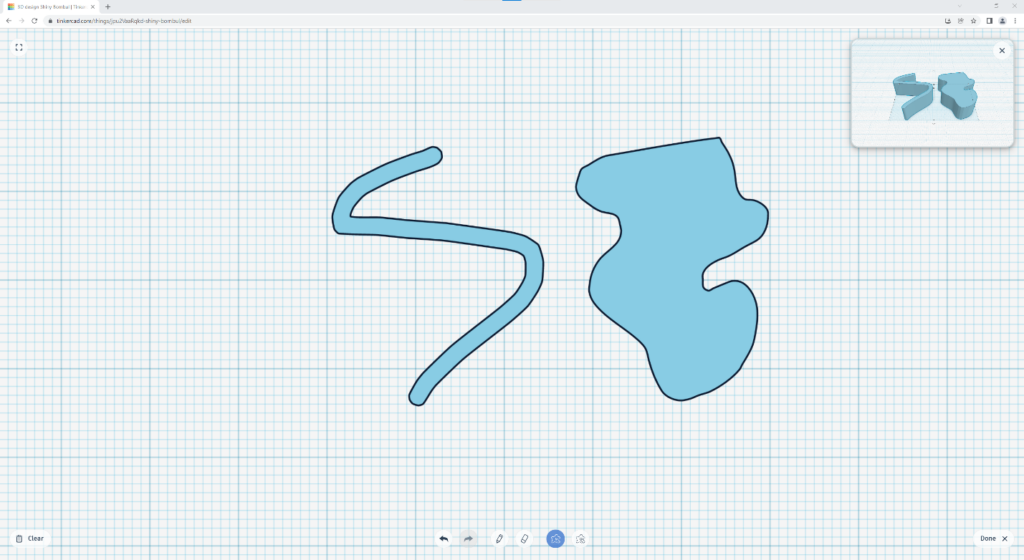
Now, you can adjust the dimensions and orientation of your design. To do this, select the “Done” button on the bottom right. This will re-open the previous canvas screen with your object selected, allowing you to use the slider adjusters on it to shape it to your liking.

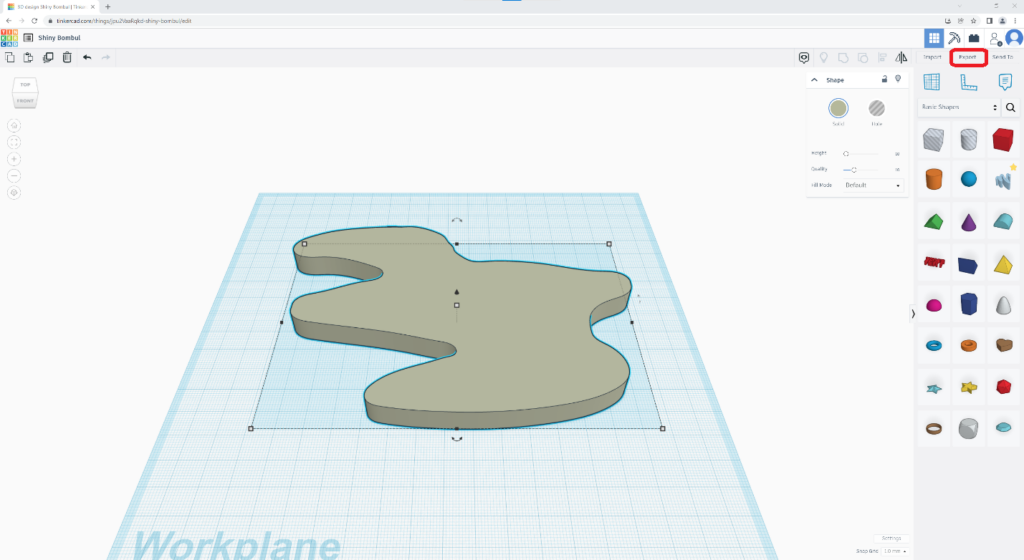
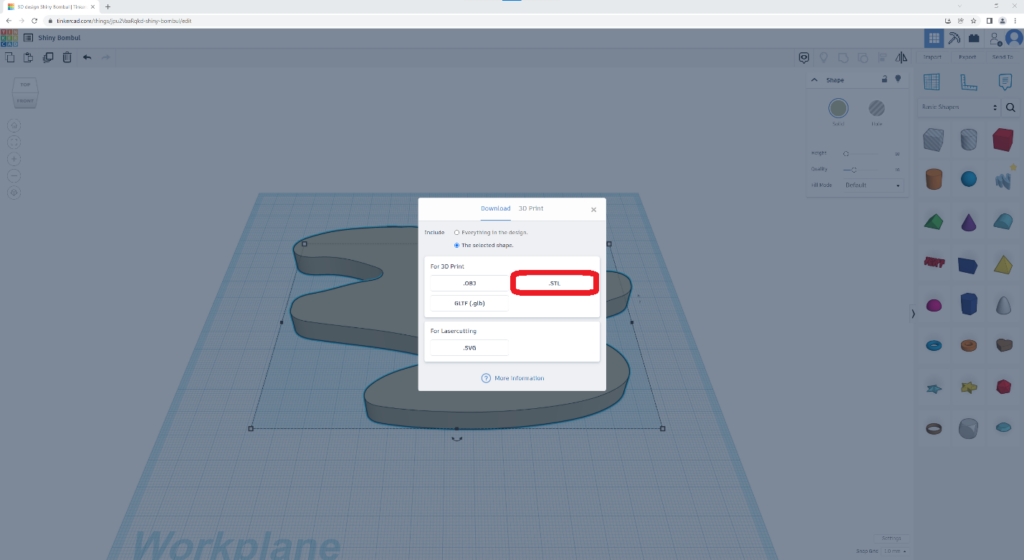
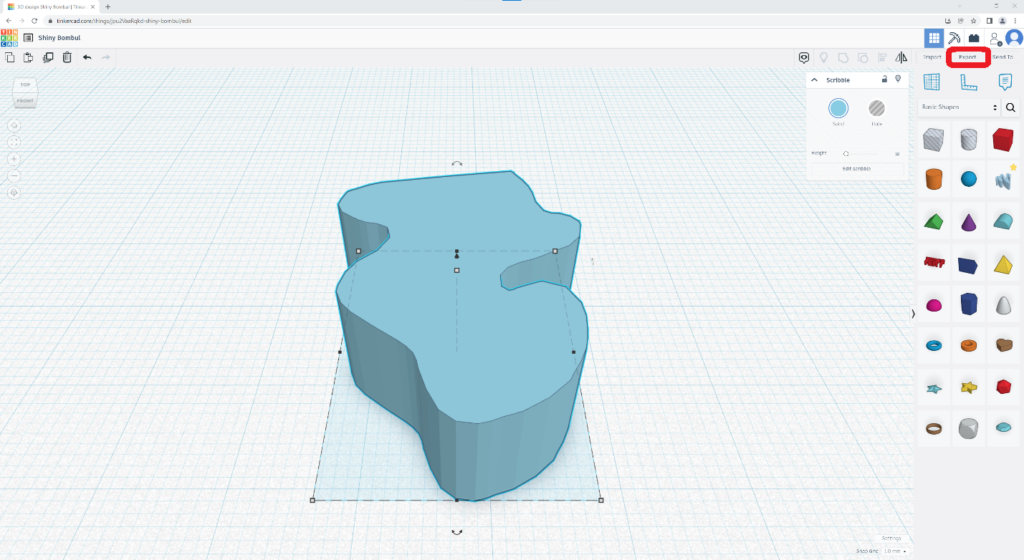
Step 4: Exporting Your Project
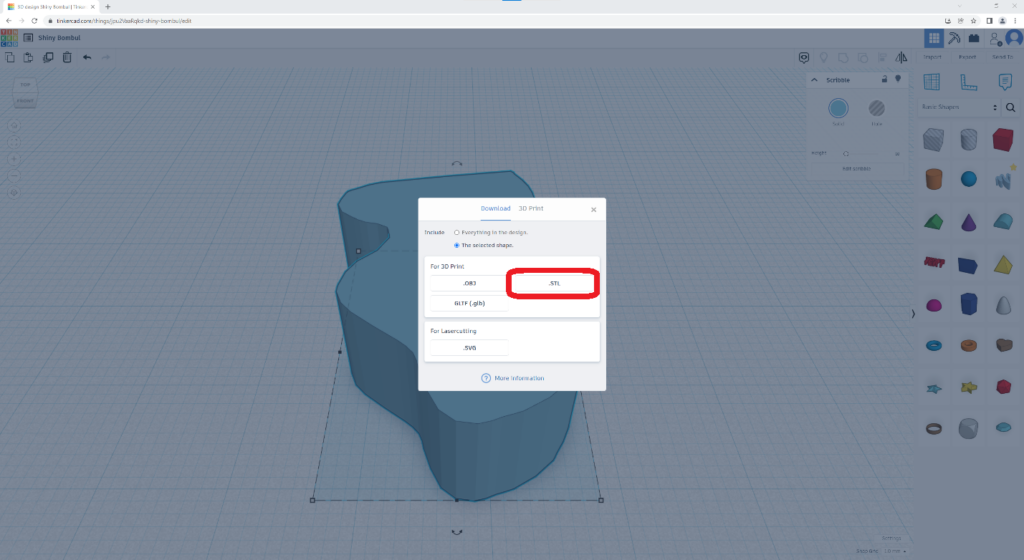
Now that you have the design that you want, you need to save it so that you can 3D print it later. Select the “Export” button in the top right corner and choose to download it as an .STL file. It will automatically export to your Downloads folder on your device. You’re now ready to print!
Method 2: Using the Makerspace Technology
Step 1: Navigating Tinkercad
Start by opening the Tinkercad website on a Windows computer in the web browser of your choice. Google Chrome is generally the preferred browser for this, but Microsoft Edge also works. Click the “New” button on the top right and select “3D Design” to begin your project. This will open the Tinkercad canvas.
Step 2: Drawing Your Project
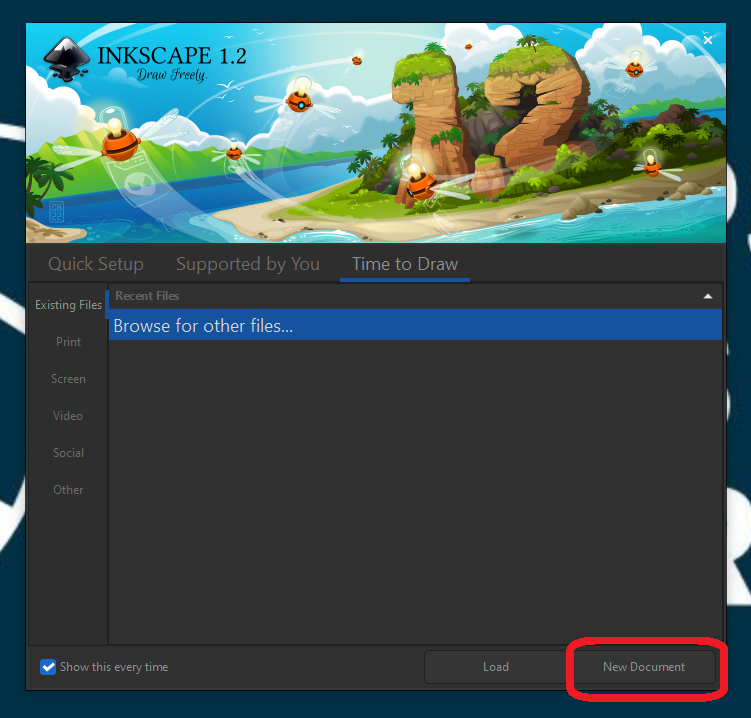
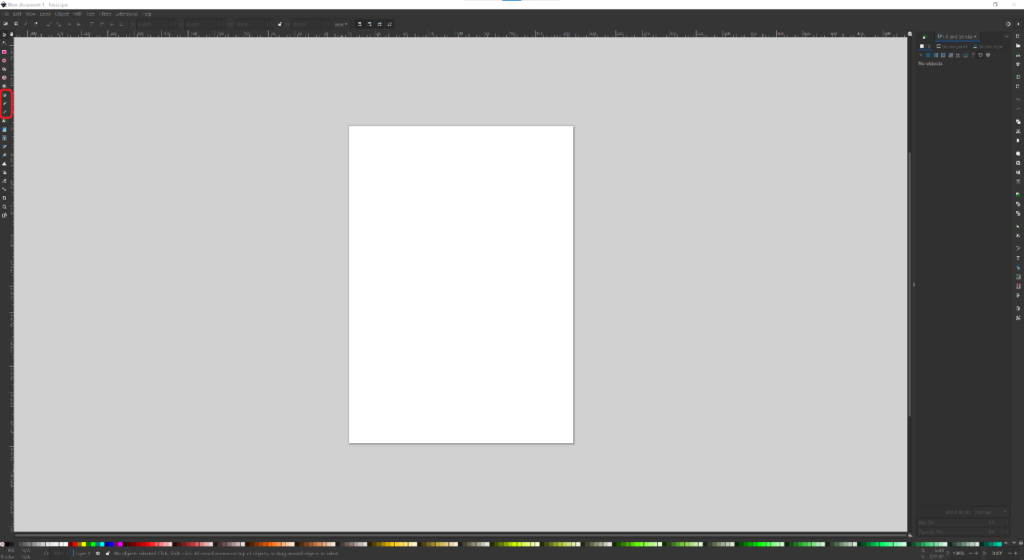
Plug in the Wacom pen tablet and open the Inkscape program located on the desktop. Click the “New Document” button to start drawing your project.

On the left sidebar, select which type of lines you would like to draw. The main options that are compatible with 3D designing in Tinkercad have green accents on them. To draw, simply select your preferred line type and draw on the Wacom tablet to create a shape.
When lifting the Wacom pen, your design will be selected in the program. For Tinkercad to be able to import your drawing, it must be filled. To do this, go to the right sidebar and click the tab that says “Fill”. Then, click and drag the opacity slider labelled “A” to 100.

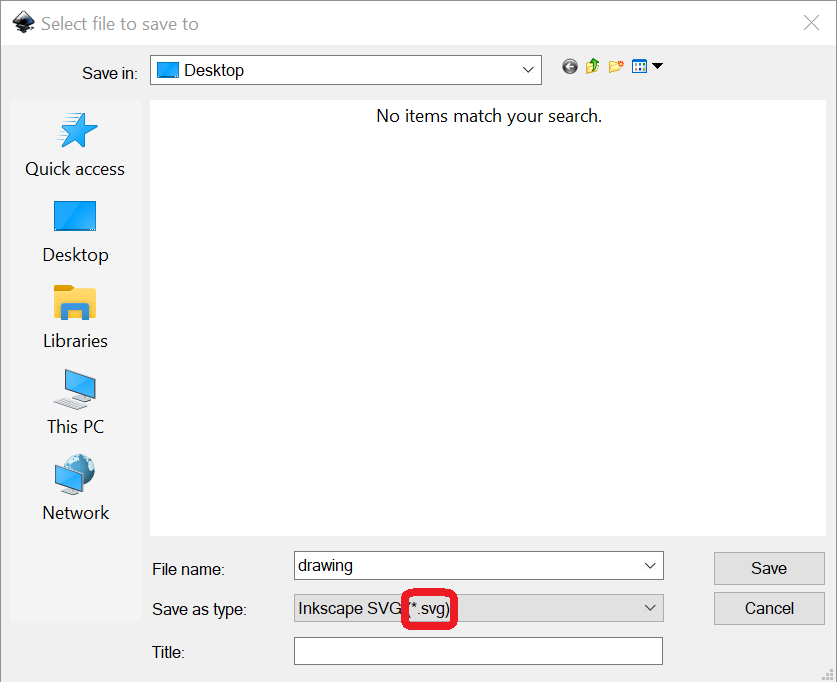
Once satisfied with the design you created, save your project as an .SVG file by clicking “File” and selecting “Save As”. Make sure to remember where on the computer you saved it!
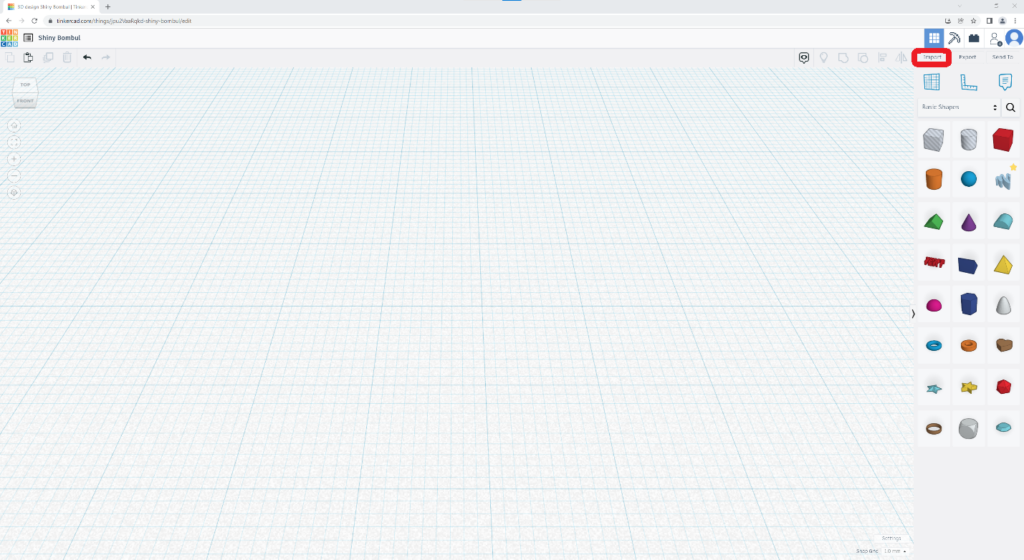
Step 3: Uploading Your Design to Tinkercad
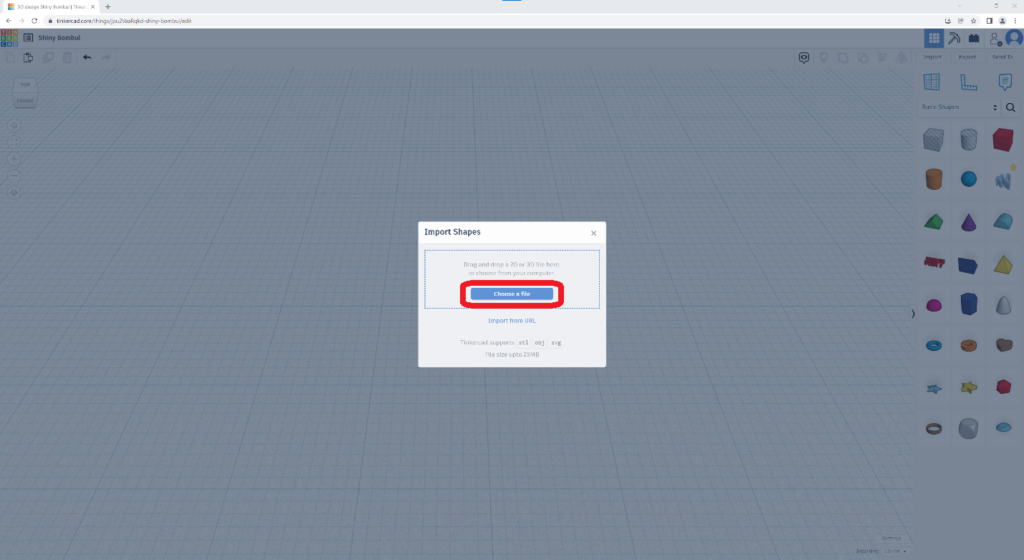
Returning to your web browser, which is open to the Tinkercad canvas, click the “Import” button on the top right and select “Choose a file”. Upload your design to your canvas; the program will automatically select your design.
Now, you can adjust the dimensions and orientation of your design. To do this, use the slider adjusters on it to shape it to your liking.
Step 4: Exporting Your Project
Now that you have the design that you want, you need to save it so that you can 3D print it later. Select the “Export” button in the top right corner and choose to download it as an .STL file. It will automatically export to your Downloads folder on your device. You’re now ready to print!